Home › Utilities › Winclone Pro
Updated
The catalogue note
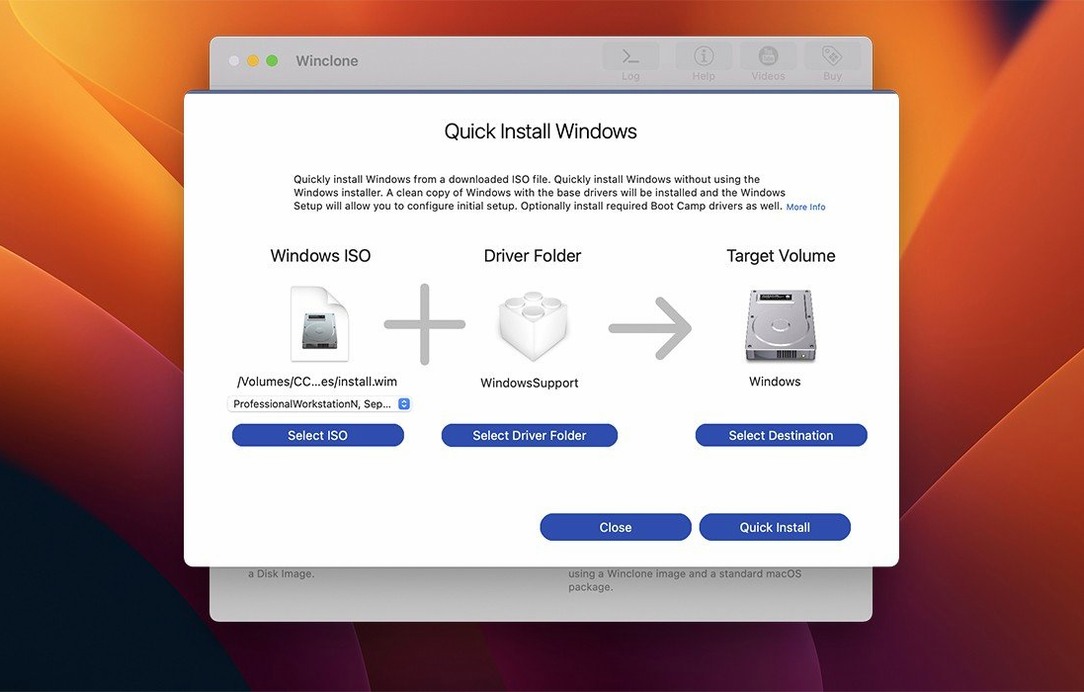
Boot Camp Windows installations can be cloned, migrated, and restored using the Mac utility Winclone. This page walks through one realistic task: cloning an existing Boot Camp partition and restoring it to a larger drive.
What is Winclone and what does it do?
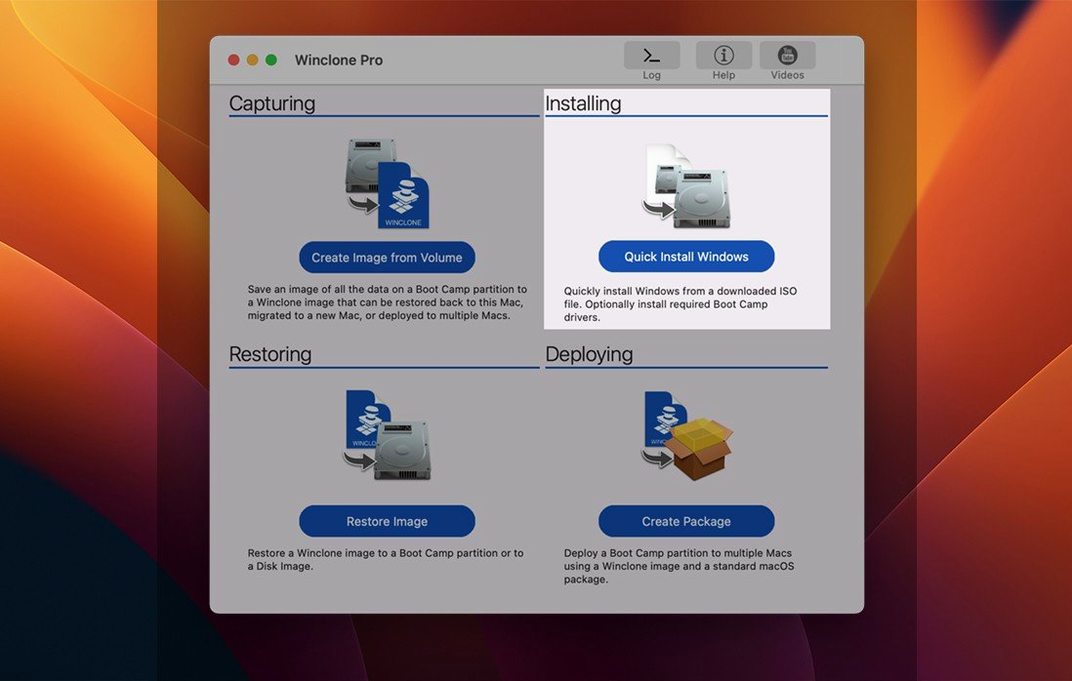
Winclone handles the full cycle of Boot Camp partition management. It can create full or incremental images of a Windows partition, shrink or expand the file system to fit a new drive, and restore images to DOS-FAT32, ExFAT, or NTFS volumes. The 10.5 update verified Tahoe compatibility and updated OS requirements.
How do you clone a Boot Camp partition with Winclone?
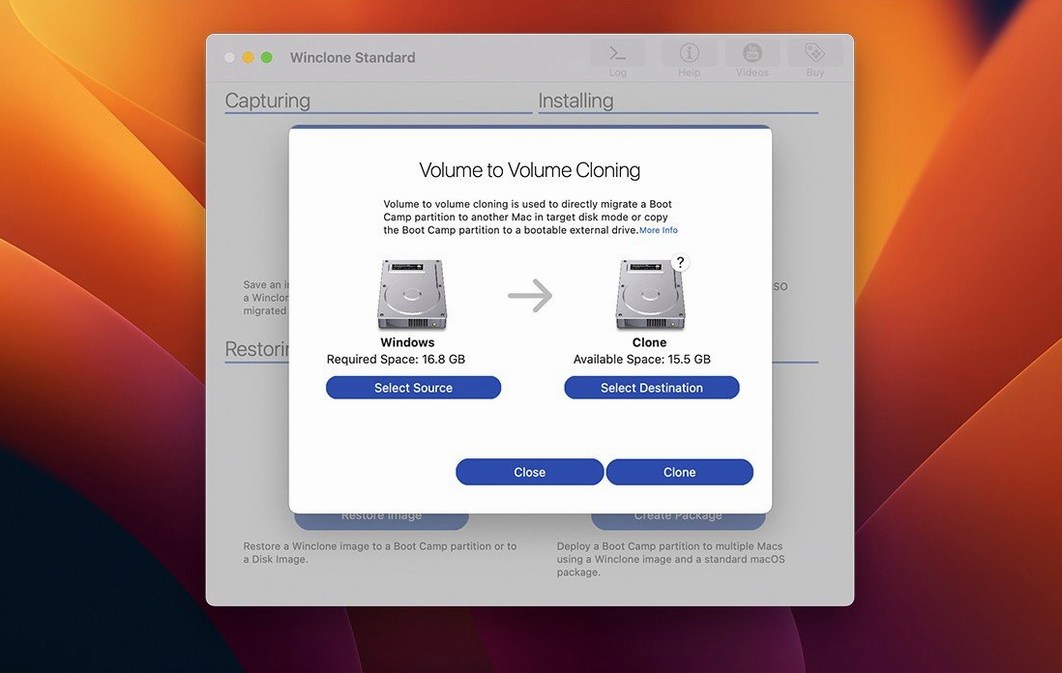
You boot the Mac from a Winclone disk image, run the app, and select the source Boot Camp partition. Winclone creates a compressed image or an incremental backup. For a direct disk-to-disk migration, you can attach the target drive and let Winclone copy the partition with the correct geometry.
What happens when restoring an image to a different drive?
Winclone can shrink or expand the file system automatically so the restored partition uses the full space on the new drive. It also supports creating a package installer that builds a Boot Camp partition and restores the image into it — useful for deploying to multiple machines via MDT or SCCM.
How Winclone fits with other apps and macOS features
Winclone works alongside the standard macOS disk tools rather than replacing them. You still use Disk Utility for initial partition layout or to erase a target drive before a restore. What Winclone adds is the ability to handle NTFS volumes natively — Disk Utility cannot create or clone those. The macOS dd command can copy raw bytes, but it cannot shrink or expand the file system, nor does it understand Windows boot records. Unlike dd or Disk Utility, Winclone identifies and flags mismatched GPT and MBR boot records that those tools overlook.
For network storage, Winclone writes images to any mounted volume. This means you can use a SMB share, an AFP volume, or a local Thunderbolt RAID. The app does not impose its own network protocol, so you pair it with your existing storage infrastructure. Incremental images work the same way over these mounts.
Winclone also integrates with macOS notification sounds. The app plays a distinct tone for success and failure, so you can step away during a long clone and hear the result from across the room. This is a small detail but practical in a lab with multiple machines running.
Comparing Winclone with similar Mac apps
Winclone versus Apple Migration Assistant
Apple's Migration Assistant copies user accounts, applications, and settings between Macs, but it does not touch Boot Camp partitions. If your workflow requires preserving a Windows installation alongside macOS, Migration Assistant is irrelevant for that task. Winclone is the only tool in this comparison that handles the Boot Camp partition directly.
Winclone versus Clonezilla
Clonezilla is a free, open-source disk imaging tool that can clone NTFS partitions. It boots from its own media and does not need macOS to run. However, Clonezilla operates on raw disk images or sector-by-sector copies. It cannot shrink or expand the file system, and it does not understand Boot Camp's hybrid partition scheme. Winclone's detection of inconsistent GPT and MBR boot records is a feature Clonezilla lacks entirely. For a single Boot Camp machine, Clonezilla works but requires more manual steps to fix boot records afterwards.
Winclone versus Paragon Hard Disk Manager
Paragon Hard Disk Manager for Mac manages partitions and can handle NTFS, but it is a general-purpose tool. Winclone focuses specifically on Boot Camp deployments. Paragon does not create package installers for MDT or SCCM, nor does it support incremental imaging of Windows partitions. For one-off partition resizing, Paragon is fine. For repeated deployments or network imaging, Winclone saves time.
Set default image location to external storage
After installing Winclone, open the preferences panel. Two settings matter most for everyday use:
- Default image location — Set this to your external storage or network share. Otherwise, Winclone saves images to the desktop, which fills your startup drive quickly.
- Incremental backup mode — Enable this if you plan to image the same machine regularly. The first image is a full clone; subsequent images store only changed blocks, saving time and disk space.
If you work with older Windows versions, check the legacy bootable installation option in the restore settings. This forces a traditional BIOS-style boot record rather than EFI, which is necessary for Windows 7 on certain hardware.
Test network mount and keep a bootable USB drive
- This confirms your network mount, SIP state, and disk image mounting work before you handle a production machine.
- Keep a bootable USB drive. Winclone creates a disk image you mount at boot time. Write that image to a USB stick with Etcher or
dd. If your main macOS installation fails, you can still boot the USB and restore a Winclone backup. - Label your images clearly. Use the machine name, date, and image type in the file name. Winclone does not embed metadata in the image name, so a naming convention saves confusion when you have ten
bootcamp.winclonefiles on a NAS. - Disable SIP only for the install. After you drag the app to your Applications folder and run it once, re-enable SIP in Recovery Mode. Winclone does not need SIP disabled for normal operation, and running with SIP off weakens macOS security.
A workflow: migrating a Boot Camp partition to a new Mac
This workflow assumes you have two Macs with Boot Camp installations.
- On the source Mac, boot from the Winclone disk image. Select the Boot Camp partition as the source. Choose an incremental image and save it to a network share. The first image will be a full clone.
- Leave the remaining space unformatted. Winclone will create the Boot Camp partition during restore.
- Boot the target Mac from the same Winclone disk image. Attach the network share containing the image. Select the Restore function and choose the image file.
- Winclone presents a list of target volumes. Select the unallocated space you created. Enable the option to expand the file system to fill the available space.
- Start the restore. Winclone shows a progress estimate and completion percentage. The process takes roughly the same time as the original clone, depending on drive speed and network throughput.
- When the sound notification plays a success tone, reboot into the Boot Camp partition. Windows runs through first-time hardware detection because the drive geometry changed. After one reboot, the installation is ready.
If you are deploying to more than a handful of machines, use the package installer feature instead. That skips the manual restore step and creates a self-contained installer that builds the partition and writes the image in one pass.
Changes in this build
- Updated OS requirements.
- Verified Tahoe compatibility.
Before it goes on the Mac
- macOS 10.15
- Intel processor
Questions from the room
Can Winclone restore an image to a drive that is not the original size?
Yes. Winclone can shrink or expand the Boot Camp file system during restoration, so the partition fits the target drive regardless of size differences.
Does Winclone support legacy and EFI booting?
Yes. The app includes options to make a legacy bootable installation and to make EFI bootable on Windows 7 and later.
Installing it on the Mac
- Mount the disk image and run Open Gatekeeper friendly.
- Press Enter in the Terminal window to bypass Gatekeeper.
- Drag the app to the Applications folder.
- Disable SIP before installing.
Notes from the control room
Sign in or open a catalogue account to leave a note.
No notes from the room yet. If you have used this build for a week, a short note helps the next person.