Updated
The catalogue note
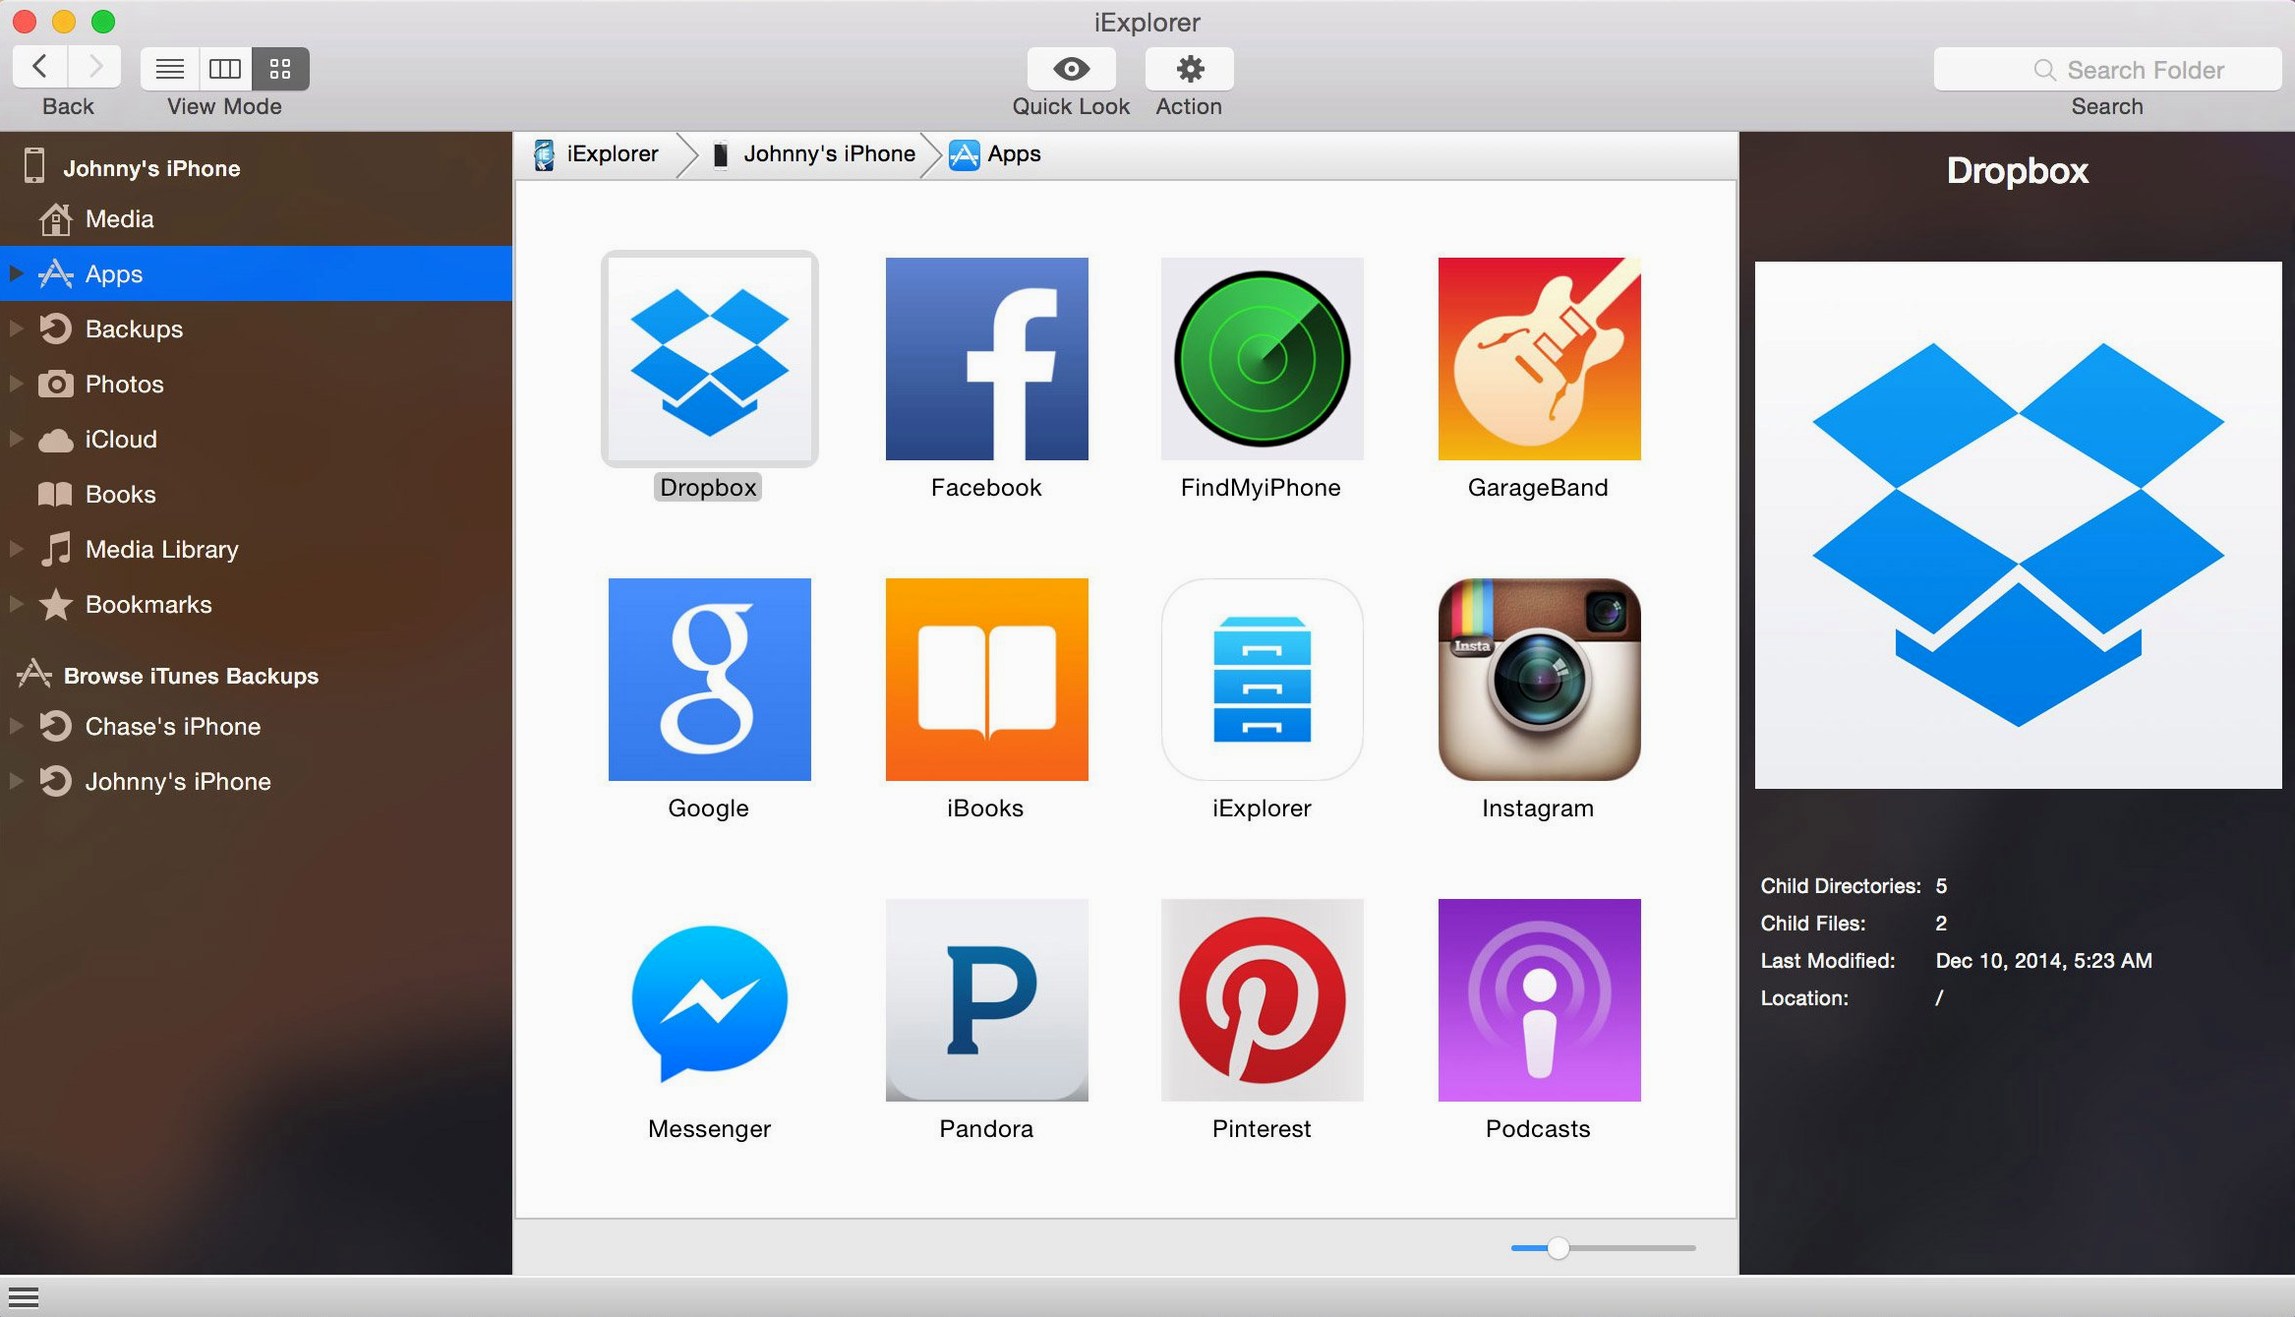
Open the device disk view and you will see iExplorer mounts your iPhone, iPad, or iPod as a browsable volume. That is the first thing a newcomer should try — no extra setup, just plug in the device and the drive icon appears in the sidebar.
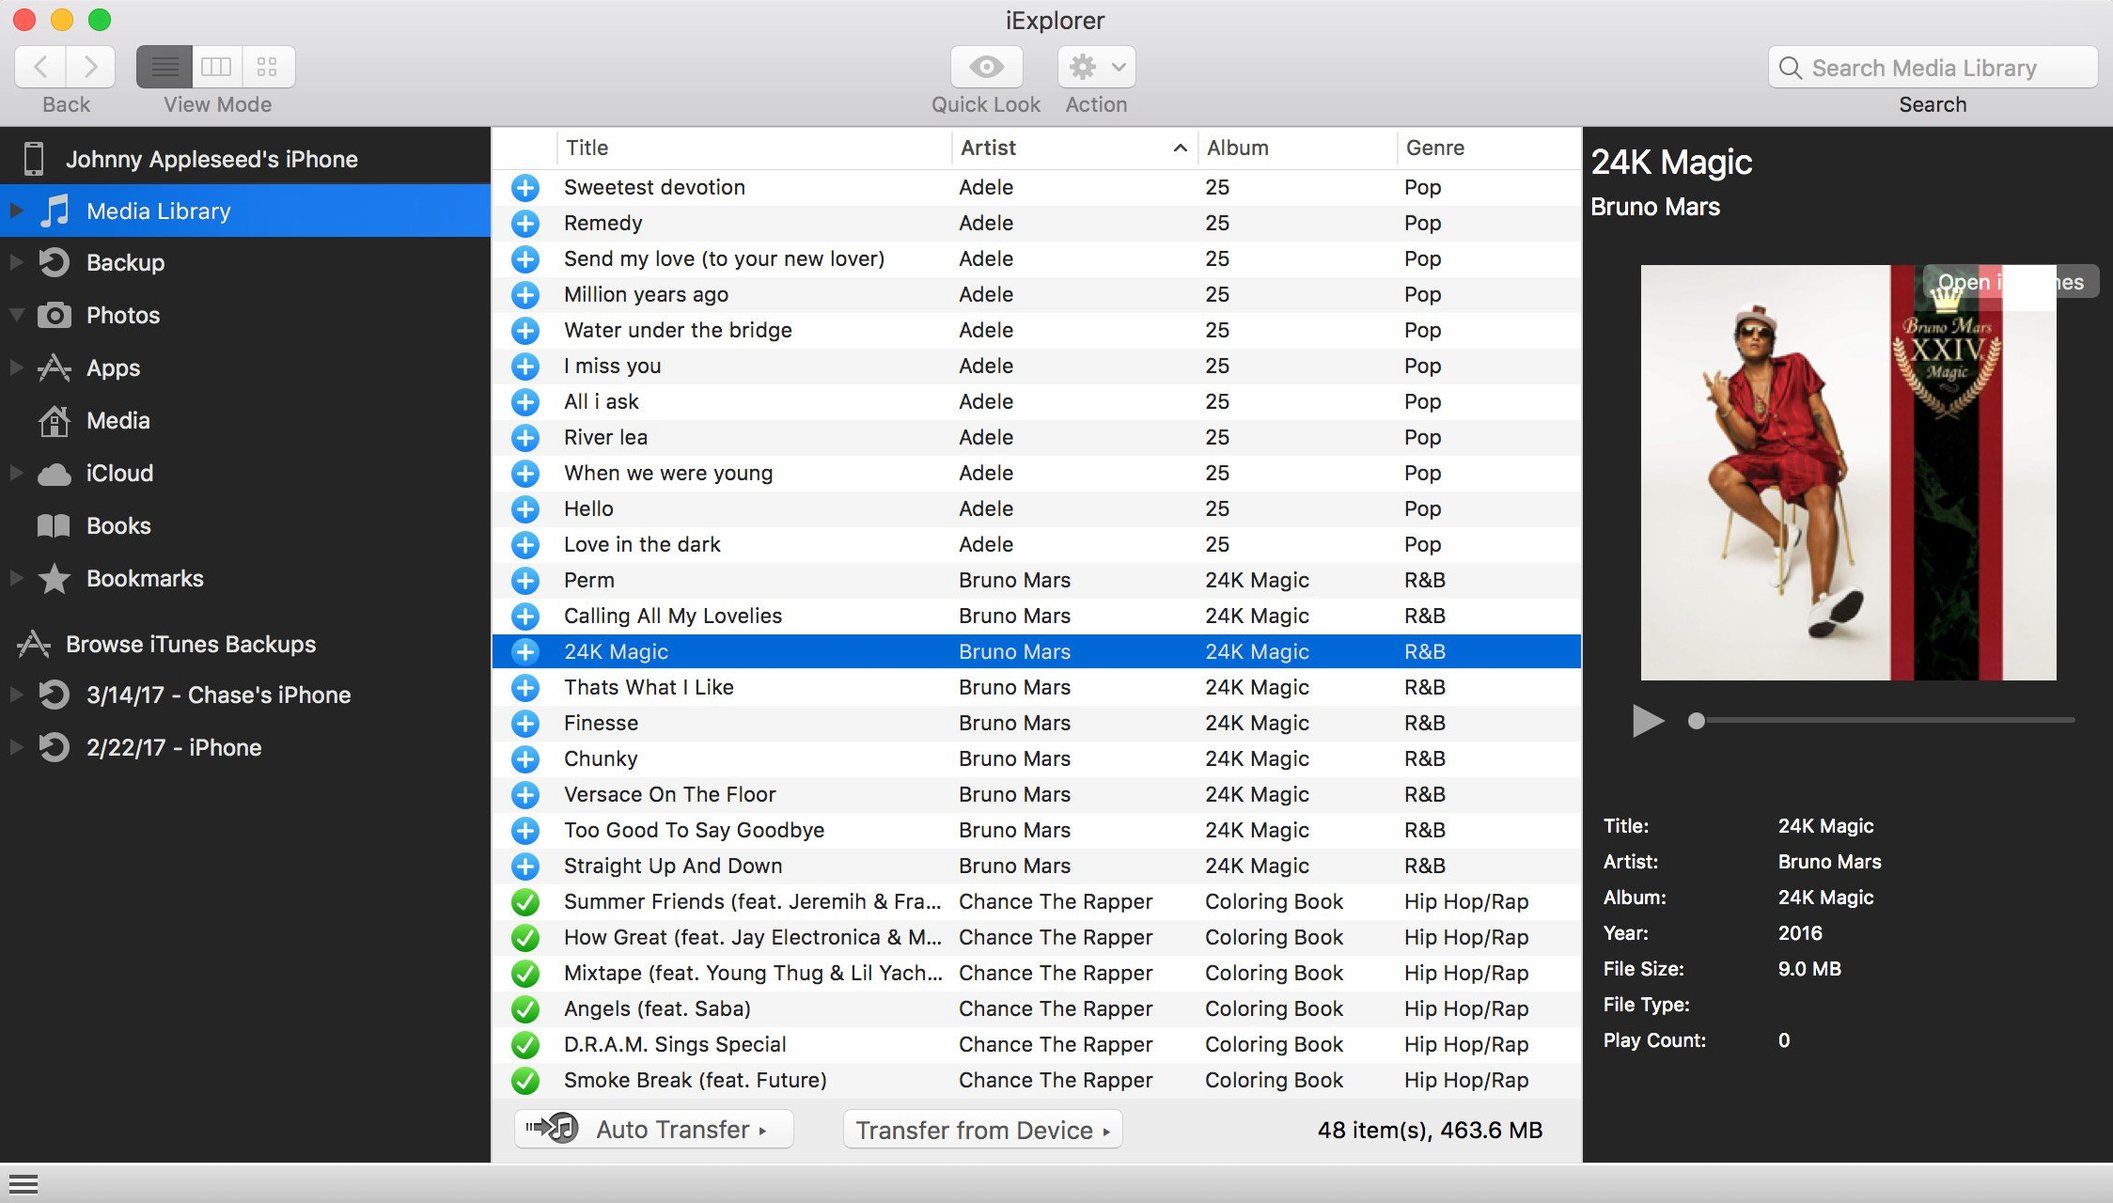
Transfer music and playlists to iTunes
Select the device and navigate to Music. You can drag entire playlists or individual tracks directly into iTunes. The transfer preserves metadata and play counts, which is useful for restoring a library after a wipe or moving tracks off an older iPod.
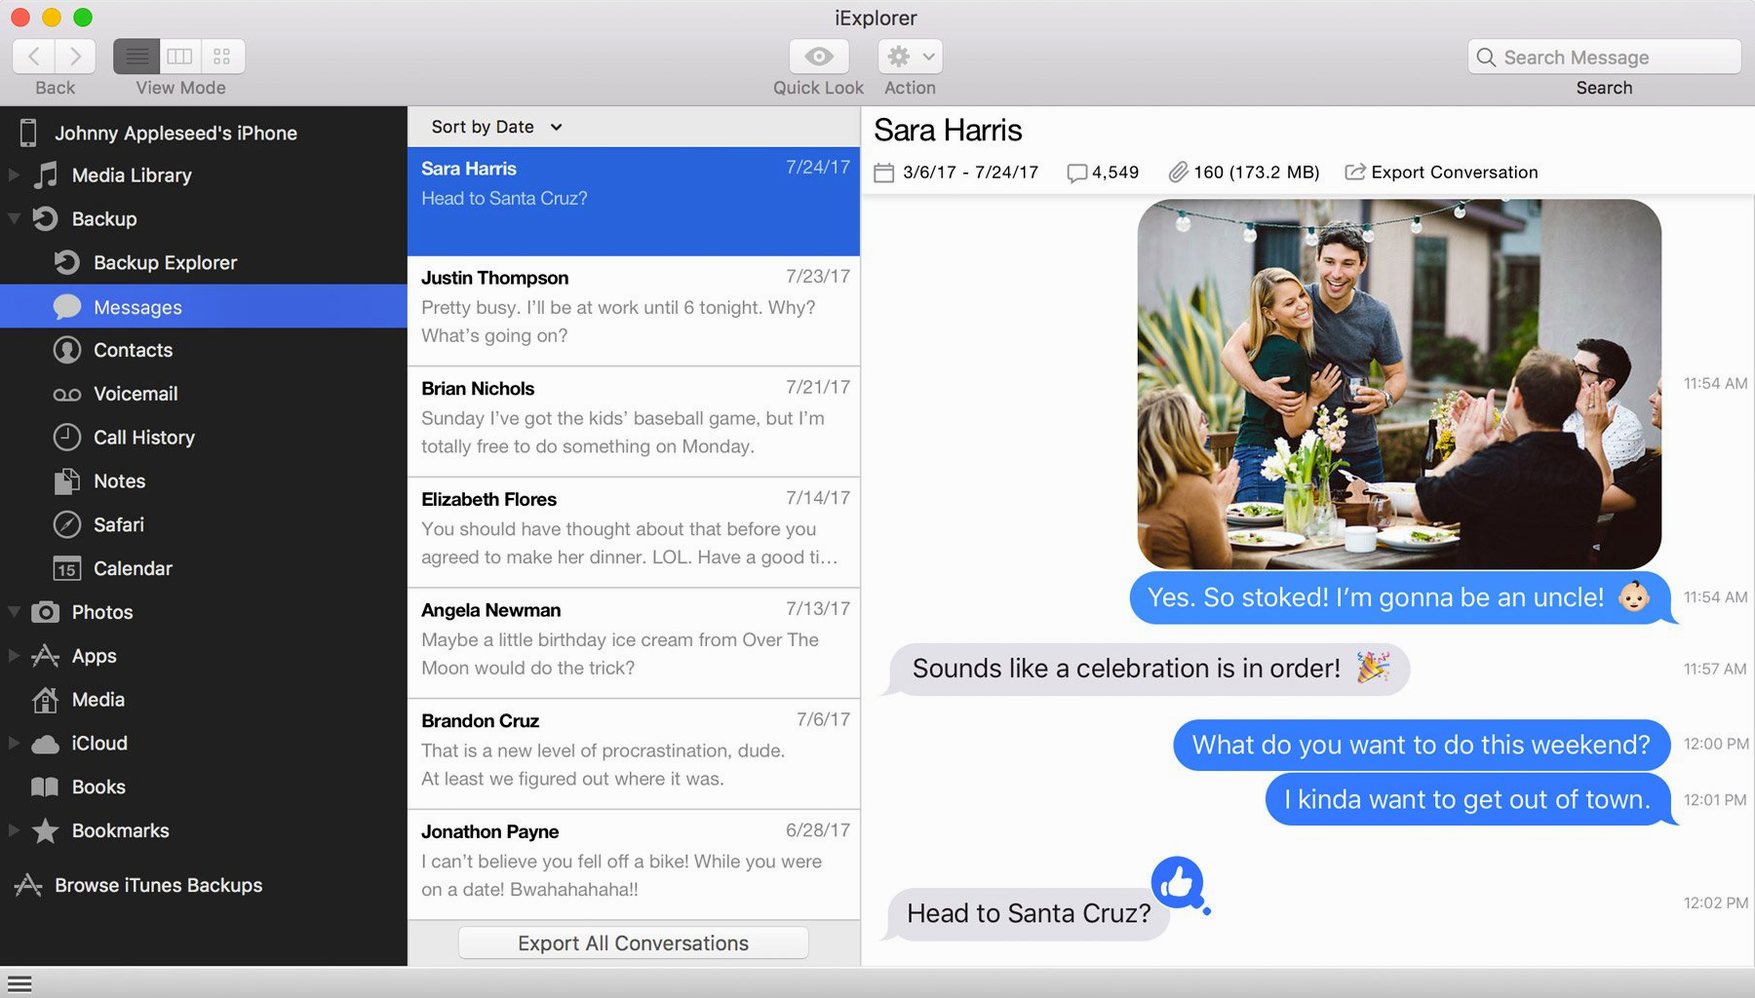
Browse text messages and app data
Open the Messages section to read and export text conversations. The App Data folder gives access to app-specific files, icons, and documents — handy when an app does not offer its own export function.
Access iCloud and local backups
iExplorer can open iCloud storage inside the app, so you can pull files without switching to a browser. It also lists backups stored on the Mac, letting you restore individual items rather than the whole backup.
Mount the device as a disk
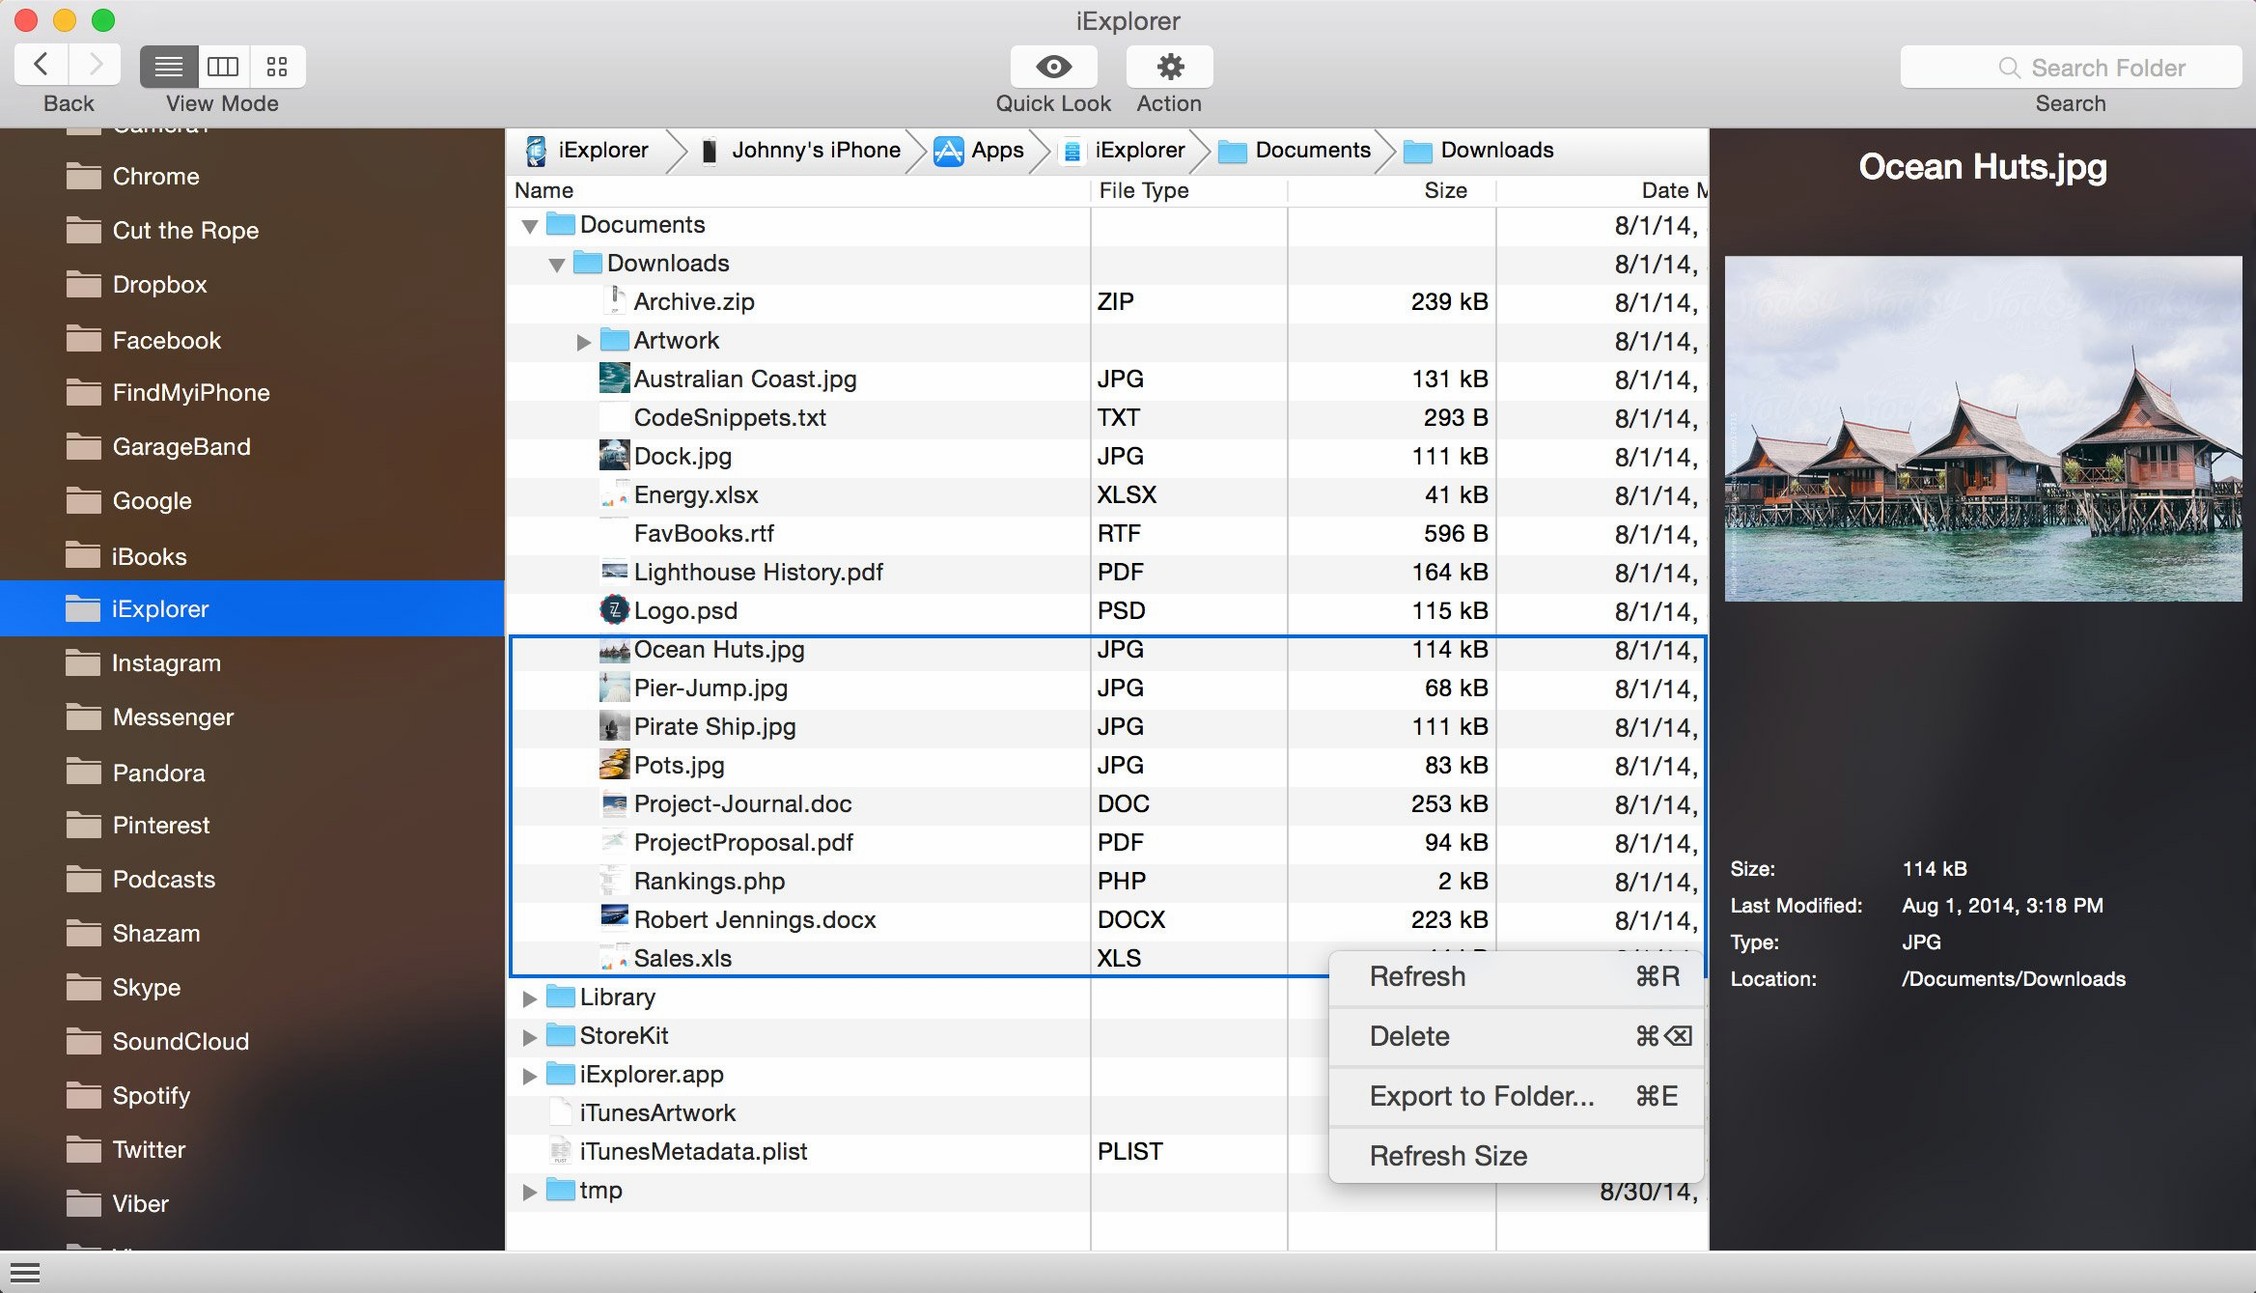
Toggle the disk mount feature and the device appears in the Finder sidebar. You can then copy photos, videos, or documents with drag and drop, just like an external drive. No jailbreak required — iExplorer works on any connected iOS device out of the box.
Install iTunes before launching iExplorer
The most common misstep is forgetting to install iTunes before launching the app. iExplorer requires iTunes for device drivers and communication — the app will not recognise a connected iPhone or iPad until iTunes is present and has been run at least once. Another frequent error is disconnecting the device while a transfer is in progress. Unlike a Finder copy, iExplorer does not always recover gracefully from an interrupted write, which can leave partial files on the device.
New users also tend to skip the Gatekeeper bypass step during installation. The disk image includes a signed binary, but macOS may still block the launch. Running the Terminal command as instructed resolves this immediately; dragging the app to Applications without that step often results in a "damaged" or "unidentified developer" warning that looks alarming but is harmless.
A third mistake is assuming iExplorer can write to any app folder. The utility reads most app containers, but writing back into certain protected directories (for example, some third-party app sandboxes) fails silently. Always test a small file first if you plan to replace app documents.
Redirect the backup location to an external drive
Before you start browsing, open Preferences and adjust the default backup location. iExplorer stores its own backup copies in your home folder by default, which can fill a small SSD quickly. Point it to an external drive or a dedicated partition instead.
Enable the "Show disk mount icon in menu bar" option. This gives you a one-click way to mount or unmount the device as a Finder volume without reopening the main window. If you transfer files often, it saves several clicks per session.
Turn off automatic backup scanning if you only need file transfer. The app checks for new backups every time you connect a device, which adds a few seconds of delay. Disabling it in Preferences > Backups keeps the interface snappier when you are only moving music or photos.
Workflow: Restore contacts and messages from an old backup
This is a task iExplorer handles well: pulling contacts and iMessage history from a previous backup after setting up a new iPhone.
- Connect the old device or locate its backup file in iExplorer's Backups section. Backups are sorted by date and device name, so find the one you want.
- Click Contacts. Select all entries and choose Export > vCard. Save the .vcf file to the desktop.
- Go to Messages. Tick the conversations you need — the app shows previews so you can pick the relevant thread. Export as PDF or plain text, whichever you prefer for reference.
- On the new iPhone, open the Settings app and import the vCard via Mail or AirDrop. The messages file stays on your Mac as a readable archive.
- Optionally, mount the new device as a disk in iExplorer and copy the exported files back into an app like Notes or Files for quick access on the go.
This method avoids restoring a full backup, which would overwrite newer data. iExplorer lets you cherry-pick what you need.
Real-world scenario: A music producer's library rescue
Alex runs a small home studio and had an old iPod classic loaded with reference mixes and sample libraries. The iPod's hard drive was beginning to fail, but iTunes would not let him copy files off it without wiping the device first.
He plugged the iPod into his Mac, launched iExplorer, and mounted it as a disk. The Music section showed every track with full metadata. The transfer took a while but completed without errors.
From there, Alex imported the files into Ableton Live and organised them by BPM and key. The iPod is now retired, but the samples live on in his project folder. For him, iExplorer replaced a tedious manual re-rip of dozens of CDs and saved a library that would have been lost to a dying drive. iExplorer recovers data from locked or damaged iPhones, making it useful for users seeking an "iexplorer torrent" alternative. A working copy from a legitimate source is the safer route.
Changes in this build
- iOS 16 compatibility improvement.
Before it goes on the Mac
- macOS 10.10 or later
- Intel 64-bit architecture
- iTunes installed
- Interface language: English
Questions from the room
Does iExplorer require a jailbroken device?
No. iExplorer works with any connected iPhone, iPad, or iPod device without jailbreaking.
Can I transfer music from an iDevice back to iTunes?
Yes. iExplorer lets you transfer music and playlists from an iPhone, iPod, or iPad directly into iTunes.
Installing it on the Mac
- Mount the disk image and launch the app with Gatekeeper-friendly mode.
- Press Enter in Terminal to bypass Gatekeeper.
- Drag the app to the Applications folder.
- Launch the app when installation is complete.
Notes from the control room
Sign in or open a catalogue account to leave a note.
No notes from the room yet. If you have used this build for a week, a short note helps the next person.