Home › Utilities › Carbon Copy Cloner

Carbon Copy Cloner 7.1.6 (Mac)
Updated
The catalogue note
The Safety Net feature in Carbon Copy Cloner is what first caught my attention. It keeps multiple versions of your files on the backup volume, so a mistaken edit or deletion doesn't have to mean a full restore from an older clone. CCC 7 is the latest version, fully qualified on macOS Golden Gate, and it runs as a native application on both Intel and Apple Silicon Macs.
It's a backup and file copying utility, plain and simple, but the depth is in the choices:
- Select entire disks for a bootable clone, or pick individual folders when you only need specific data protected.
- Schedule backups around your working hours, not the other way round.
- Use the Safety Net to keep older file versions without manually juggling snapshots.
- Boot from the cloned disk if your main drive fails — that's the core promise of a true clone.
- Works on Intel and Apple Silicon without translation layers.
CCC 7 dropped support for Catalina, Big Sur, and Monterey, so check your Mac's age before moving up. If you're running a supported system and want a backup tool that behaves like a studio utility — precise, dependable, no fuss — this is worth a look.
Adjust the Safety Net retention policy first
When you first open CCC 7, the default task setup will work, but a few adjustments make it suit a real working environment better. I'd start with the Safety Net retention policy — by default it keeps every changed file indefinitely, which fills a backup drive faster than you'd expect. Set a limit: a week or two of older versions is usually enough for a studio machine where projects get replaced daily.
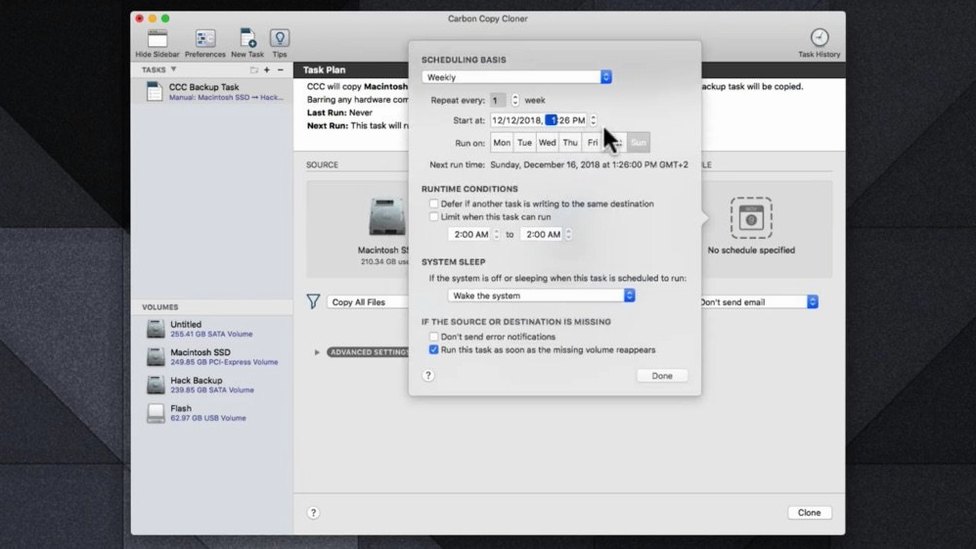
Next, check the scheduling behaviour. The app lets you pick a specific day and time, but if your Mac sleeps overnight, the backup might never run. I prefer to set it for a time when the machine is awake anyway — late morning, after the first coffee — and enable the option to wake the Mac if it's asleep. That way the task actually completes.
Finally, decide whether you want a bootable clone or a simple data backup. CCC 7 can do both, but a bootable clone needs a destination drive at least as large as your source drive, and it takes longer to update. If you only need file protection and have a good macOS recovery partition, a data-only task with Safety Net is faster and uses less disk space.
Wednesday morning backup with an APFS external drive
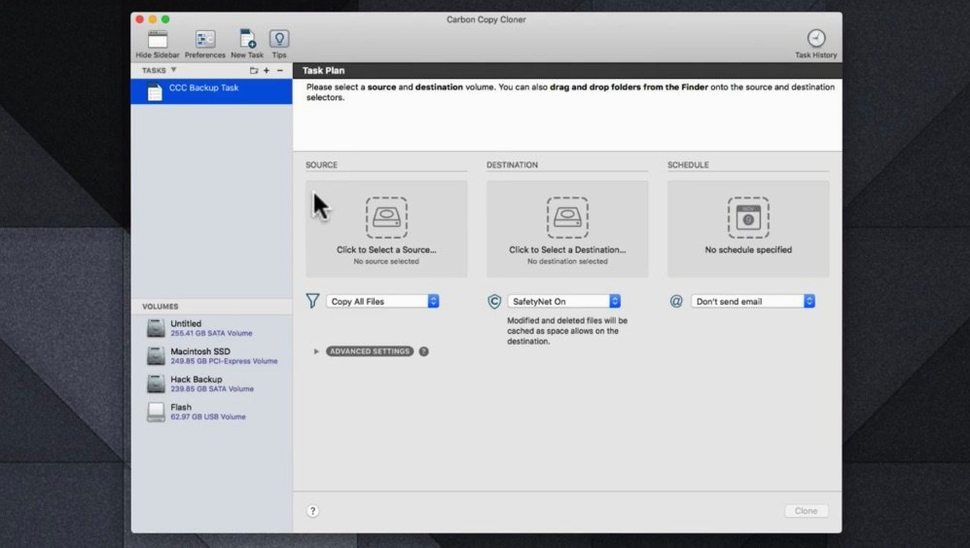
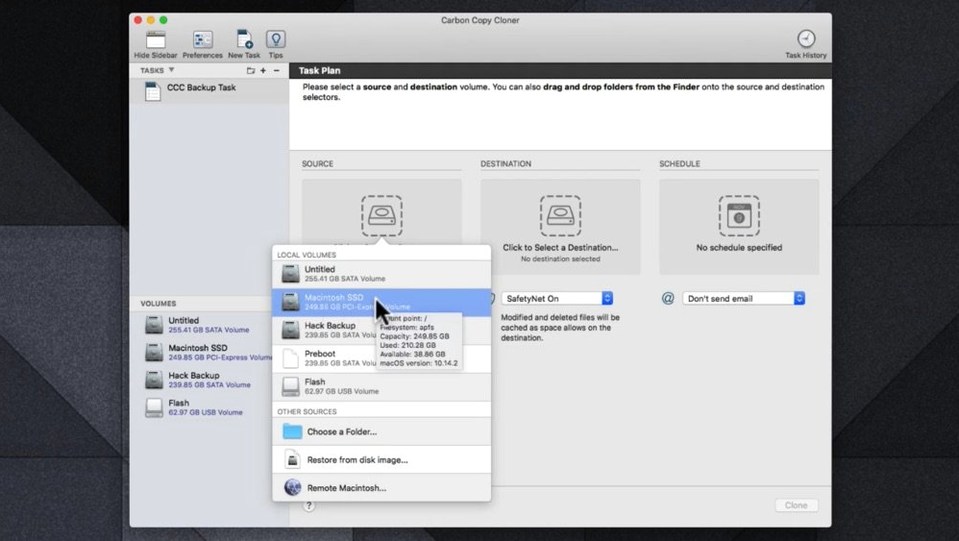
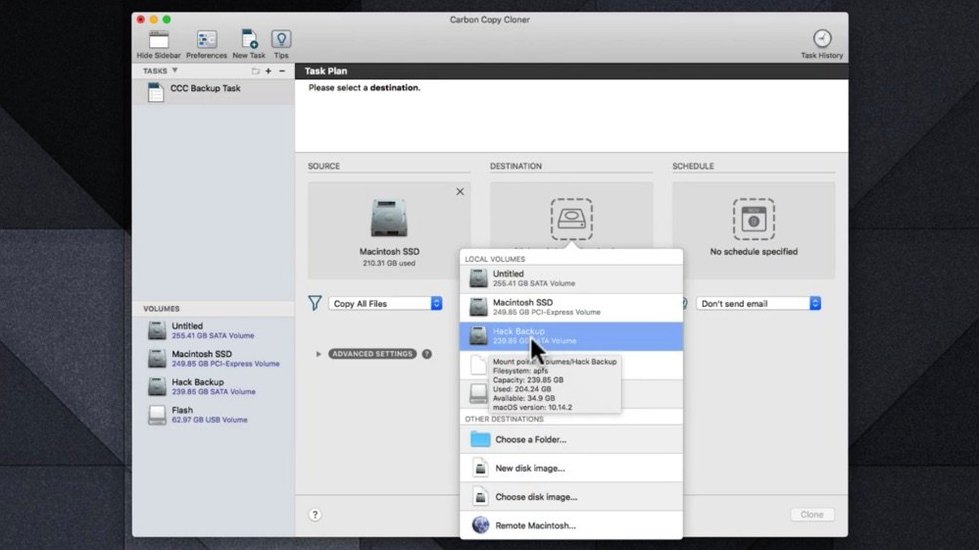
Wednesday morning, 10 AM. The external drive I use for backups is already plugged in and formatted as APFS. I open CCC 7 and see the main window: a source selector on the left, a destination selector on the right, and a big task list in between.
I've already saved a task called "Weekly Studio Clone" that backs up my entire internal drive to a 1 TB SSD every Friday at 2 PM. But today I need something narrower — just that Logic project and its audio files. I click the plus button to create a new task, drag the project folder into the source field, and select the external drive as the destination. I leave Safety Net on because I might need yesterday's rough mix if today's edits go wrong.
I click the Start button. The progress bar moves steadily. Ten minutes later, the task finishes. I close the window and get back to editing. No alerts, no configuration dialogs.
Later that week, I accidentally delete a vocal take from the project. I open the backup volume in Finder, navigate to the Safety Net folder, find yesterday's version of the file, and drag it back into the project. It takes thirty seconds. No need to restore the whole clone.
Test the clone boot by holding Option key on restart
- Test the clone boot. After your first full backup, restart the Mac while holding the Option key and select the backup volume. If it boots to your desktop, you know the clone works. Do this once, early, so you're not guessing during an emergency.
- Label your drives. CCC 7 uses disk names to identify sources and destinations. If you swap drives between Macs or projects, give each one a clear name — "Studio Backup Q3" is better than "Untitled".
- Keep the Safety Net on the same volume as the backup. Some people move it to a separate drive to save space, but then the older versions are useless if that drive fails. Let CCC 7 manage it on the backup disk itself.
- Run a manual backup before any major software update. macOS updates, plugin installations, and system migrations are the moments when a clone saves real time. Do one manually, then proceed with the update.
- Ignore the torrent sites. If you search for "carbon copy cloner torrent" or "carbon copy cloner mac torrent", you'll find old versions that don't work with Apple Silicon or current macOS releases. The same goes for "carbon copy cloner mac crack" — cracked copies from 2019 won't run on macOS Golden Gate, and they might contain malware.
Requires macOS 10.15 or later, runs natively on Apple Silicon
Carbon Copy Cloner 7.1.6 requires macOS 10.15 Catalina or later. It runs on both Intel (x86 64-bit) and Apple Silicon Macs, using a Universal binary, so there is no Rosetta overhead. It uses the standard macOS file copy APIs, so it respects your system's power management and disk arbitration.
During a backup, you'll see the process in the menu bar icon and the main window. It schedules tasks using the standard macOS launchd service, which is already present on every Mac. On Apple Silicon, the app runs natively and handles APFS snapshots efficiently.
The interface is English only. If you download via "carbon copy cloner 7 torrent" or similar channels, you risk getting a version that hasn't been updated for Golden Gate — Bombich Software regularly releases small patches for compatibility. Stick with the current build.
Backup volumes appear in the Finder sidebar automatically
CCC 7 integrates with the Finder's sidebar: backup volumes appear there automatically after the first task runs. You can browse them like any other disk. The Safety Net folder is hidden by default, but you can reveal it in the Finder's Go menu by selecting "Go to Folder" and typing .CCC SafetyNet.
Time Machine and CCC 7 coexist without conflict. I use Time Machine for hourly snapshots of my home folder and CCC 7 for a weekly full clone of the system drive. The two tools use different mechanisms — Time Machine uses hard links and sparse bundles, while CCC 7 creates a direct copy of the volume. They do not interfere. Just make sure your backup destinations are separate disks.
For studio workflows, CCC 7 pairs well with file-sharing protocols. If you back up to a network volume (SMB or AFP), the app handles reconnection gracefully — if the volume is offline when the task runs, it waits and tries again later. The same applies to USB and Thunderbolt drives that might be disconnected between sessions.
macOS's built-in encryption, FileVault, is fully supported. If your source drive is encrypted, the clone will also be encrypted, provided the destination is formatted as APFS. CCC 7 asks for your password once per session, not every time a task runs. This is a small but welcome detail for anyone who keeps their studio Mac locked down.
Before it goes on the Mac
- macOS 10.15 Catalina or later
- Intel or Apple Silicon
- English interface
Installing it on the Mac
- Install the app by dragging it to your Applications folder.
- Open it and follow the on-screen activation instructions included with the download.
Notes from the control room
Sign in or open a catalogue account to leave a note.
No notes from the room yet. If you have used this build for a week, a short note helps the next person.