QLab 5.6.5 (Mac)
Updated
The catalogue note
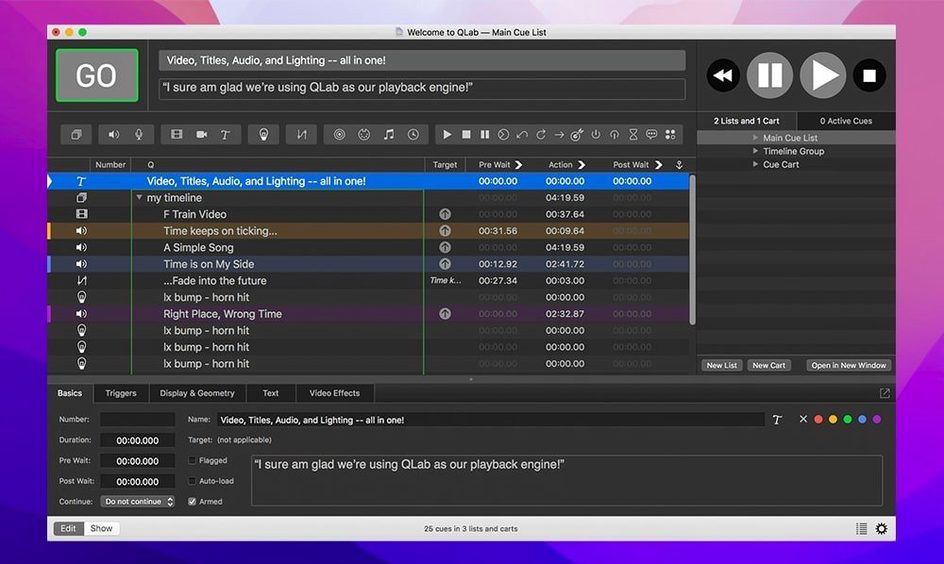
If you have ever built a theatre playback rig with a sequencer and a stack of CDs, QLab is the modern version of that. It is sound, video, light and show control in one application, and the workflow is surprisingly direct for what it does.
Create a workspace and add your first audio cue
- Create a new workspace and add an audio cue. QLab can handle 48 outputs and 24 inputs, so even a modest multi‑channel playback setup works from the start.
- Open the integrated audio editor and trim the start or end of your audio file. No need to jump out to another tool for simple edits.
- Add a video cue and test the video fader. You can overlay titles directly in the cue, which saves an extra graphics pass.
- Assign a network device for show control. If you use Right On Cue Services Stage|Tracks, version 5.6.3 automates the device migration from earlier workspaces.
- Use undo freely. Changes in the workspace can be rolled back, which makes experimenting with cue order and timing less risky.
The animation tools and the light library are further along the learning curve, but the core loop — add a cue, adjust its level or start time, play it — is what makes QLab useful from the first session. For live performances and installations, that is where the value lives.
Name your show in the workspace inspector
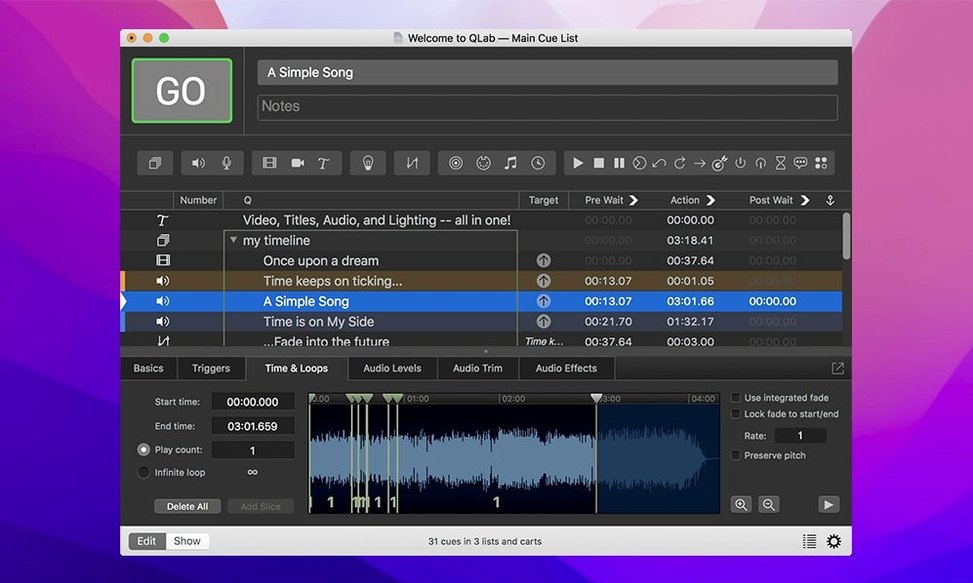
You open QLab and see the default workspace: a single vertical cue list, empty. The first thing is usually to name your show in the workspace inspector — not required, but helpful when you have several versions. Then you start populating the cue list. For a play with pre-recorded sound effects, you drag audio files from Finder straight into the cue list. Each file becomes a cue with its own properties. You set the start time relative to the previous cue, or you leave it on Go and trigger each one by pressing the space bar during the show.
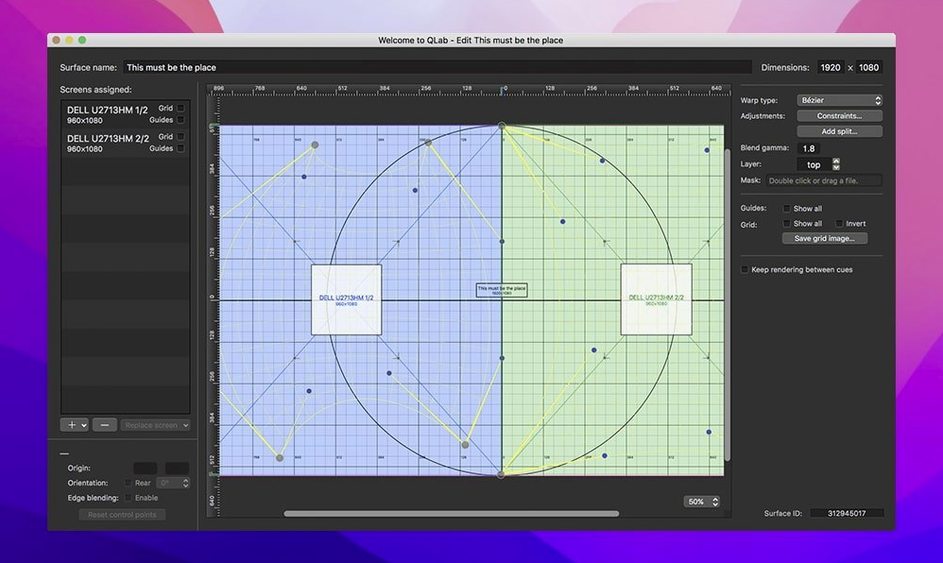
Next comes the video. You add a video cue and point it to a projector output. If the venue has keystone issues — and they often do — you open the video geometry panel and adjust the corner pinning until the image sits square on the screen. Then you add a title overlay for the scene number. The overlay renders on top of the video, no external graphics software needed.
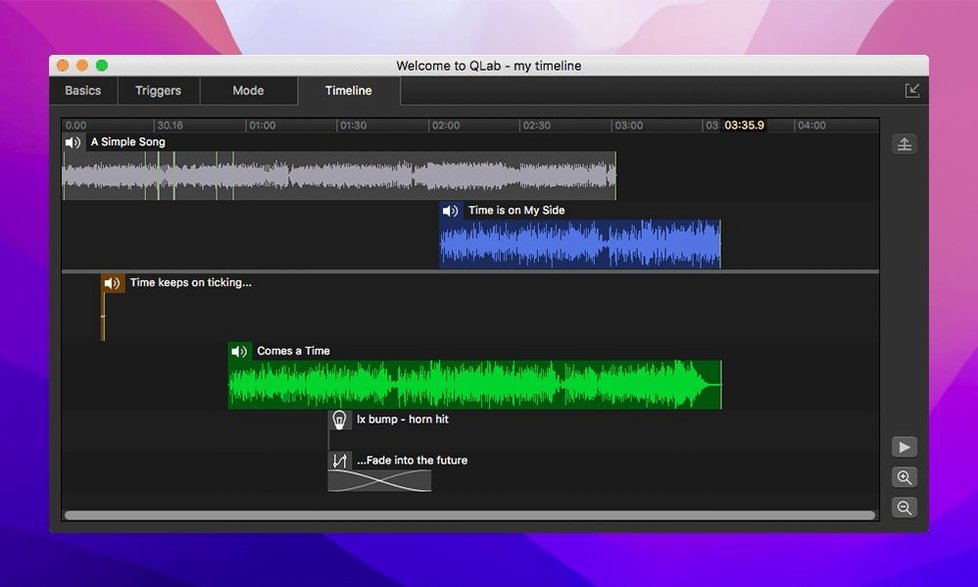
You build a short sequence of three cues: an audio cue for the door slam, a video cue for the backdrop projection, and a MIDI cue to trigger a stage light desk. You test it. The audio plays through output one, the video hits the projector, and the MIDI message fires. Then you add a second audio cue that crossfades with the first, using the audio fader. You adjust the fade duration by dragging in the timeline. The whole sequence runs in under two minutes, and you have a working proof of concept for the sound designer to approve.
During rehearsal, you discover a lighting fixture is showing a red warning on the light board. You open the Light Library editor, and one row is highlighted in a different colour — QLab 5.6.3 flags misconfigured instrument definitions this way. The Light Patch editor shows Broken for that fixture. You fix the DMX address in the instrument definition, the colour returns to normal, and the show carries on.
Spot misconfigured instruments with row colour changes
Version 5.6.3 makes three practical changes. The row colour change in the Light Library editor is the one you notice first: a misconfigured instrument stands out immediately, so you do not have to hunt through every row looking for problems. The Broken status in the Light Patch editor works the same way — it replaces guesswork with a clear indicator. The third change, the workspace migration for Right On Cue Services Stage|Tracks, happens automatically when you open an older workspace. You do not need to reconfigure network devices manually. These are small improvements, but they save time when you are under pressure during tech rehearsals.
Resolve common QLab snags quickly
Audio cue does not play through the expected output
Check the audio routing in the workspace audio settings. QLab supports 48 outputs and 24 inputs, but the default routing might not match your interface. Go to the audio tab and assign the cue to the correct output pair. If you have a multi‑channel interface, label the outputs in your patch sheet first.
Video does not appear on the projector
Verify the video output is assigned to the correct display in the workspace video settings. QLab can send video to any connected display, but it does not auto‑detect projectors. Also check the video geometry: keystone correction or corner pinning can push the image off the edge if the values are extreme. Reset them to zero and adjust from there.
MIDI or OSC cues do not trigger the lighting desk
Network show control relies on the device definition. If you upgraded from 5.6.2 or earlier, the workspace should migrate automatically to the built‑in Right On Cue Services Stage|Tracks definition. If the device still does not respond, open the network device editor and confirm the IP address and port match the lighting desk. A simple ping test from Terminal can confirm the connection.
The light library shows rows in strange colours
That is the Broken status from version 5.6.3. Open the instrument definition and check the DMX address, the profile assignment and the patch. Once everything is valid, the colour returns to normal and the Broken text disappears.
Undo does not revert a cue deletion
Undo works within the current session, but it is not infinite. If you delete a cue and then perform several other actions, undo might skip past that point. The workaround is to keep a duplicate workspace file before making major edits. QLab can have multiple workspaces open at once, so you can copy a cue list into a backup window before deleting.
Run QLab 5 on macOS 11 or later on Intel or Apple Silicon
QLab 5.6.3 requires macOS 11 or later and runs on both Intel and Apple Silicon Macs. The installer comes as a disk image — you mount it, run the Open Gatekeeper friendly step, then press Enter in Terminal to bypass Gatekeeper, drag the application into your Applications folder and launch it. That is the whole install routine. No additional drivers are needed for basic audio and video playback, though third‑party interfaces and Blackmagic devices may require their own drivers. The application takes up the space of a typical media playback tool, and the workspace files are small — they reference media stored elsewhere, so keep your audio and video files organised on an external drive or a shared server if the show uses many cues.
Build a sound‑and‑video sequence for a scene transition
You are designing a transition between two scenes in a play. The first scene ends, the lights go to black, a sound effect plays, a video projection fades in, and the next scene begins. Here is how to build that in QLab:
- Create a new workspace and name it Scene_2_transition.
- Set the audio output to the main house speakers. Enable the audio fader and set a fade‑in of two seconds and a fade‑out of one second at the end.
- Add a video cue below the audio cue. Load a looped video of a rain‑streaked window. Set the video output to the main projector. Enable the video fader and set a crossfade that starts one second after the audio begins, so the sound leads the image.
- Add a MIDI cue after the video cue. Send a MIDI note‑on message to the lighting desk to fade the house lights to black. Set the MIDI cue to fire at the same time as the audio cue, so the lights drop as the sound starts.
- Test the sequence. Press Go. The lights go down, the rain sound starts, the video fades in a moment later. Listen for the audio levels — adjust the cue volume in the audio properties if the rain is too loud or too quiet.
- Add a second audio cue for the next scene — a door opening sound — and set it to start one second after the rain fades out. That gives a clean transition between the two sound effects.
- Test the whole sequence from start to finish. If the timing feels off, drag the start times of the cues in the timeline or adjust the fade durations. Undo any changes that do not work.
This sequence is three cues and a few fader settings. It takes about ten minutes to set up from scratch. QLab handles the playback timing, so you do not need to sit at the console and trigger each element manually. For a live show, that means one less thing to worry about during a scene change.
Changes in this build
Version 5.6.5 has landed. The full release notes are available on the QLab site, covering the usual round of refinements to playback precision and overall stability. Nothing flashy, just the kind of maintenance update that keeps a complex show-control environment running tight.
Before it goes on the Mac
- macOS 11 or later
- Apple Silicon or Intel 64-bit
Questions from the room
How many audio outputs does QLab support?
QLab supports 48 audio outputs and 24 audio inputs.
Can I edit audio files inside QLab?
Yes, there is an integrated audio editor for trimming the start and end of audio tracks.
What changed in the Light Library editor in version 5.6.3?
Rows in the Light Library or Light Definition editor now change colour when an instrument definition in the row is misconfigured.
Installing it on the Mac
QLab Pro 5.6.5 clocks in at about 34 MB and covers Intel alongside Apple Silicon machines from macOS 11 onward — quiet on disk, quick to set up.
- Mount the disk image and launch Open Gatekeeper friendly.
- Press Enter in the Terminal window that appears to bypass Gatekeeper.
- Drag the QLab application into your Applications folder.
- The application is ready to use.
Notes from the control room
Sign in or open a catalogue account to leave a note.
No notes from the room yet. If you have used this build for a week, a short note helps the next person.