Loopback 2.5.1 (Mac)
Updated
The catalogue note
Every Mac user eventually hits the same wall: you want to send audio from one app to another, or record your microphone alongside system sound, but macOS gives you no direct way to do it. Loopback builds a bridge.
One realistic task: recording a podcast with guest audio
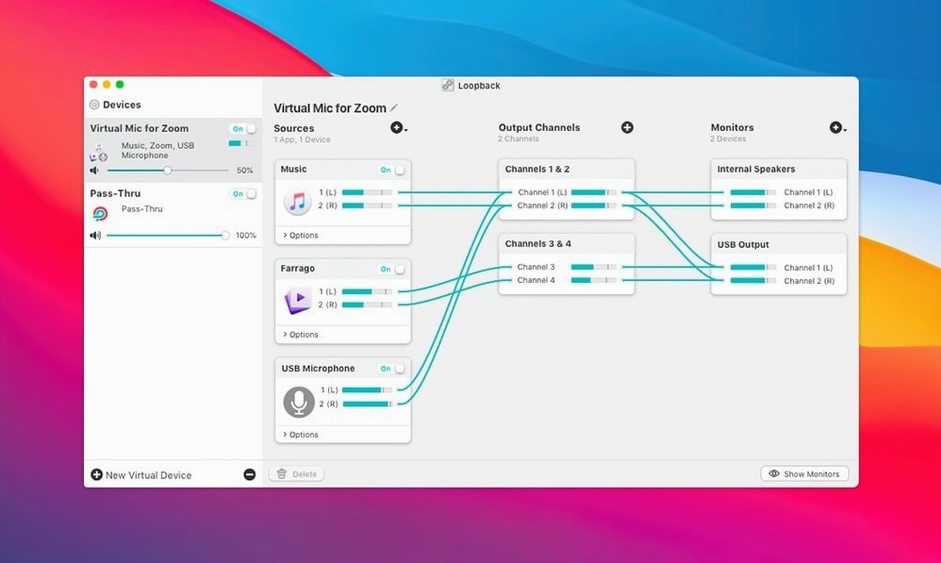
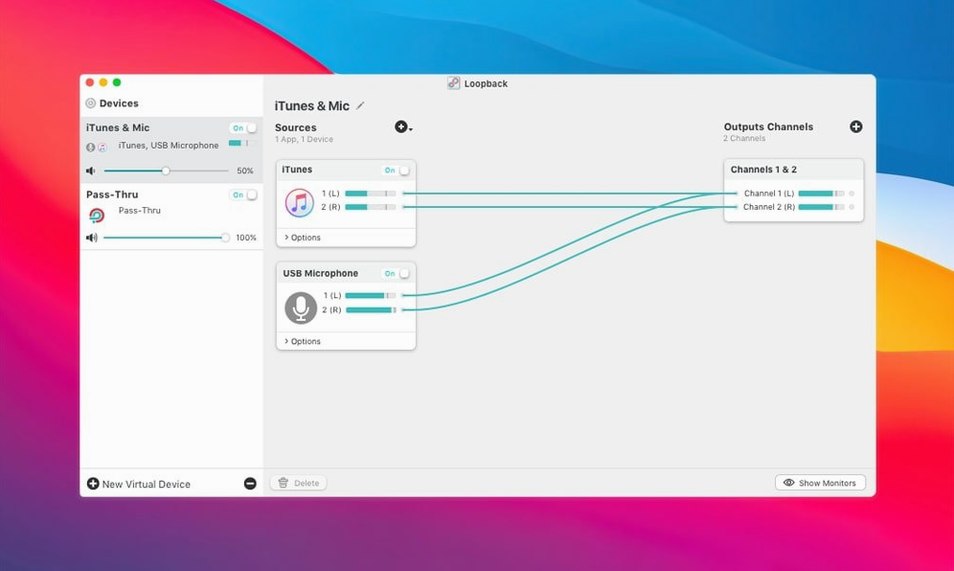
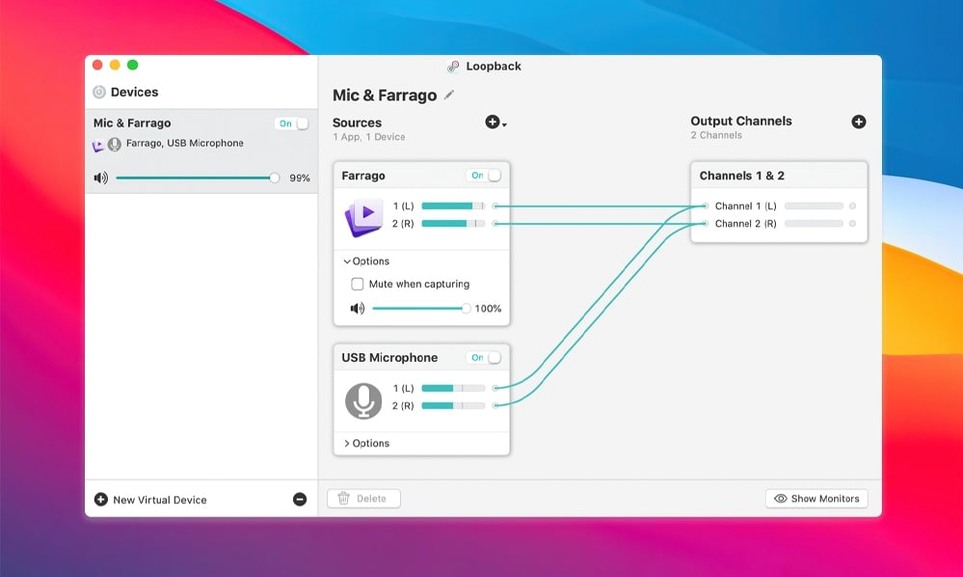
Say you need to record a conversation where you hear a remote guest through your browser, while your own mic input goes to the same recorder. Open Loopback and create a new virtual device. Add the browser as an application source, then add your USB microphone as an input device source. The virtual device now carries both signals, mixed together, and appears in any app that lists audio outputs — your recorder, a voice chat client, or a screen capture tool. The wired interface makes it obvious which source feeds where, so you can reroute on the fly without digging through system settings.
Beyond the simple mix
That same virtual device works for screen recordings where you want your mic commentary over app audio. Pair it with Elgato Game Capture hardware to record game audio and your voice in one take. Or use it as an output device inside Audio Hijack, letting you capture and process the combined stream further. Loopback is the kind of tool that disappears once it is set up — you just select the virtual device and get on with the work.
Start with a clean canvas and a single virtual device
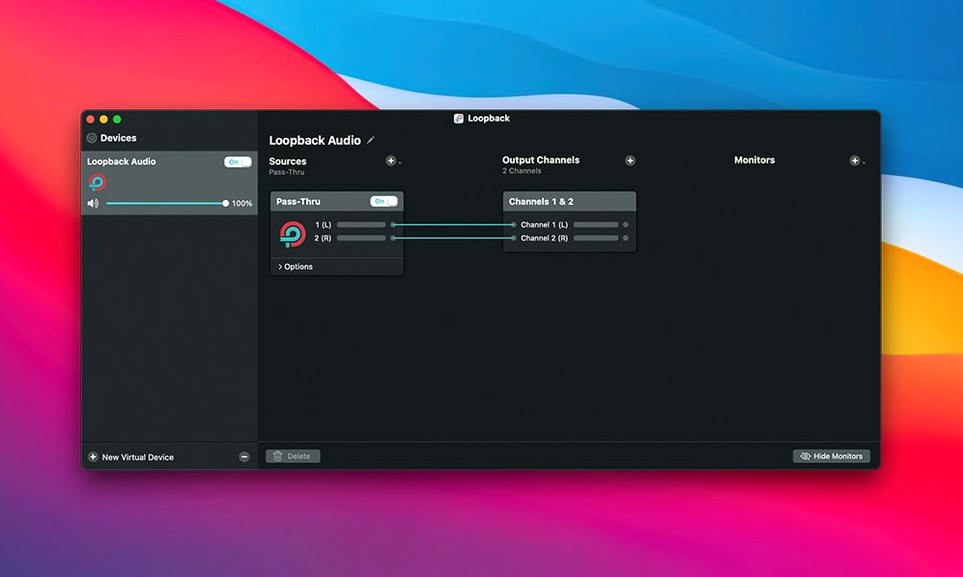
You launch Loopback and the window shows a clean canvas with a single virtual device already listed. The interface uses a node‑based layout: sources on the left, the virtual device in the centre, outputs on the right. You click the plus button under Sources to add your USB microphone, then click again to add Safari as an application source. A thin line connects each source to the virtual device, and a level meter next to each one confirms signal is present.
Now you open QuickTime Player for a screen recording. In the recording options, you select the Loopback virtual device as the audio source instead of the built‑in microphone. You hit record, narrate over a web page playing in Safari, and the resulting file contains both your voice and the page’s audio perfectly synchronised. No post‑production sync work needed.
Later in the same session you want to route that same mix into a Zoom call so the other participants hear your mic and a backing track from Spotify. Without quitting QuickTime, you create a second virtual device in Loopback, add the same mic and Spotify as sources, then select that second device in Zoom’s audio settings. The two routing paths live side by side, completely independent.
The session ends when you remove the virtual devices you no longer need — a right‑click and a delete confirmation keeps the list tidy for tomorrow.
Add one source at a time to catch routing mistakes early
Start with one source at a time. Add your microphone first, test it in a recording app, then add an application source. Adding everything at once makes it harder to spot a routing mistake. Create a single virtual device and name it something obvious — “Podcast Mix” or “Stream Output” — so you recognise it in other apps immediately. Loopback remembers your devices between launches, so you only set them up once.
Keep an eye on the level meters. If a source shows no signal, check whether the application is actually playing audio and whether you selected the correct process in the source list. Some applications spawn multiple helper processes; choose the main one. If the meter jumps but you hear nothing on the output side, confirm the virtual device is selected as the output in your destination app, not just in Loopback.
When you finish a recording session, turn off or delete the virtual devices you are not using. This prevents accidental routing of personal audio into a meeting the next day. It takes two clicks.
Podcasters and streamers replace hardware mixers with software
Podcasters who record remote interviews are the obvious fit. Loopback removes the need for a hardware mixer or a separate audio interface with loopback channels — you get the same result inside software. Streamers who use OBS or Streamlabs benefit because they can route game audio, microphone, music and alert sounds into a single virtual device without extra cables or virtual audio drivers that break after a macOS update.
Screen recording is another natural use case. Anyone who creates tutorials, software demos or walkthroughs needs the microphone and the application audio on the same track. Loopback handles this without requiring you to record two separate files and align them in an editor afterwards. Video editors who capture footage from hardware like Elgato Game Capture also find it useful, because it merges the console audio with the commentary before the capture card even sees it.
Users who work with Audio Hijack — another Rogue Amoeba product — will find Loopback fits neatly into the signal chain. You can send Loopback’s virtual device into Audio Hijack for processing, then route the processed stream back to another app. That combination covers almost any audio routing scenario a Mac user can imagine.
Keep Loopback running in the background so devices stay available
Open Loopback’s preferences and check the option that keeps the app running in the background after you close its window. This ensures your virtual devices remain available even when the main window is hidden — useful if you want Loopback to start at login and stay out of sight. Enable the option to show the app in the menu bar so you can quickly see which devices are active and mute sources without reopening the full interface.
Under the Audio tab in preferences, confirm that the sample rate of your virtual device matches the rate used by your recording software. Mismatched sample rates cause clicks or pitch shifts in the output. Loopback lets you set the rate per device, so align it once and forget it.
Adding a silent app source makes the level meter look broken
The most common mistake is adding an application source while the app is not producing sound. Loopback captures whatever the app plays, but if the app is idle, the level meter stays flat and the beginner assumes the routing is broken. Play audio through the source app first, then add it.
Another frequent error is selecting the wrong process. A browser like Chrome or Safari spawns several processes — one for the main window, others for extensions, tabs and GPU acceleration. Beginners add the helper process instead of the main one and get silence. Loopback’s source list shows process names clearly; pick the one that matches the app name exactly, not a sub‑process.
People also forget to mute their physical microphone in the destination app. If you route your mic through Loopback into a recording app, but the recording app also picks up the mic directly via the built‑in input, the voice arrives twice — once dry, once through the virtual device — causing an echo. Disable the direct input in the recording app and rely solely on the Loopback device.
Lastly, beginners sometimes create ten virtual devices on the first day and then cannot remember which one does what. Keep the count low. Name each device after the task it serves. A clean setup is easier to troubleshoot when something stops working after a macOS update.
Before it goes on the Mac
- macOS 11 or later
- Apple Silicon or Intel 64-bit Mac
Questions from the room
Can Loopback combine a microphone with app audio for voice chat?
Yes. Create a virtual device with your microphone and the chat app as sources, then select that device as the chat app's output.
Does Loopback work with screen recording software?
It does. The virtual device can capture microphone audio and application audio together, which is exactly what a screen recording needs.
Installing it on the Mac
A 33 MB download that’s at home on macOS 11 or later, Apple Silicon or Intel. Three quiet steps and you’re building virtual audio chains instead of untangling real ones.
- Open the downloaded disk image.
- Drag the Loopback icon into the Applications folder shortcut.
- Once the copy finishes, launch Loopback from Launchpad.
Notes from the control room
Sign in or open a catalogue account to leave a note.
No notes from the room yet. If you have used this build for a week, a short note helps the next person.