Home › Mac Apps › Photo Mechanic

Photo Mechanic 2025.1.8239 (Mac)
Updated
The catalogue note
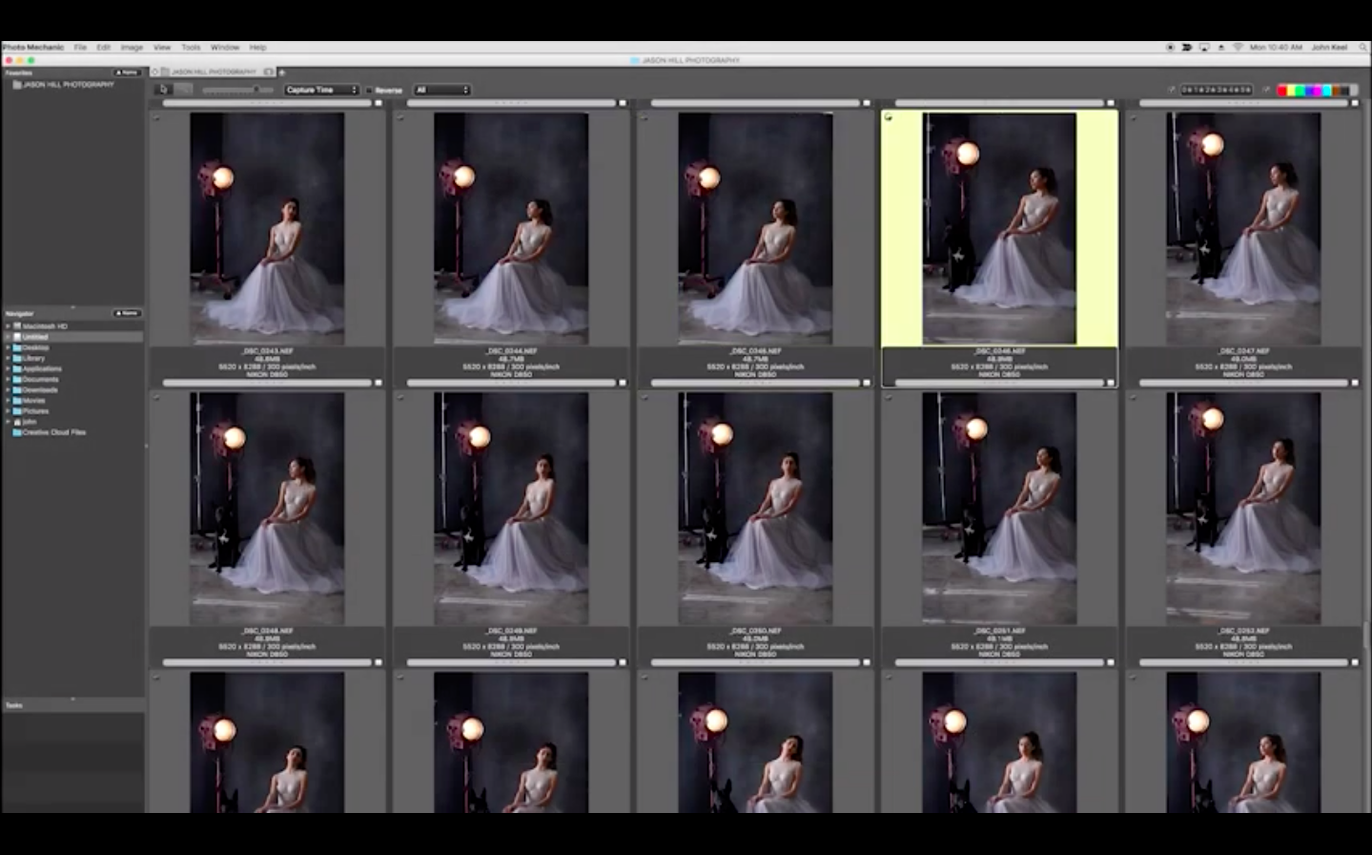
A working press photographer walks in from a three-day shoot with two thousand raw files. Photo Mechanic opens the card, scrolls through contact sheets at near-instant speed, adds keywords and captions to a dozen selects, renames them by event and date, and pushes the set to the FTP server for the picture desk. That is the workflow this application is built for.
Runs on Apple Silicon without Rosetta
- Does it run on Apple Silicon? Yes. Camera Bits ship a native version for Apple Silicon, so it runs without Rosetta translation.
- What macOS version is required? The current release needs macOS 13 or later.
- Can it edit photos? No. Photo Mechanic is a browser and metadata editor — it handles renaming, resizing, IPTC data, and FTP uploads, but not pixel-level editing.
- Does it burn discs or optimise for web? Yes to both. You can write photo selections to CD/DVD and export web-friendly copies from within the app.
Why the question about cracking it comes up
That decision comes with risks: cracked builds may miss CPU-specific optimisations, break on macOS 13, or include unwanted extras. If you rely on the app for daily work, a clean install is the straightforward choice.
A workflow for sorting and captioning a wedding shoot
Start with the memory card from the second shooter, which has about 1,500 raw files from a ten-hour wedding. Ingest the card using Photo Mechanic's copy-and-rename function — this creates a folder structure by date and renames files with the couple's surname and a sequence number. The ingest also embeds a basic copyright notice into the metadata of every file.
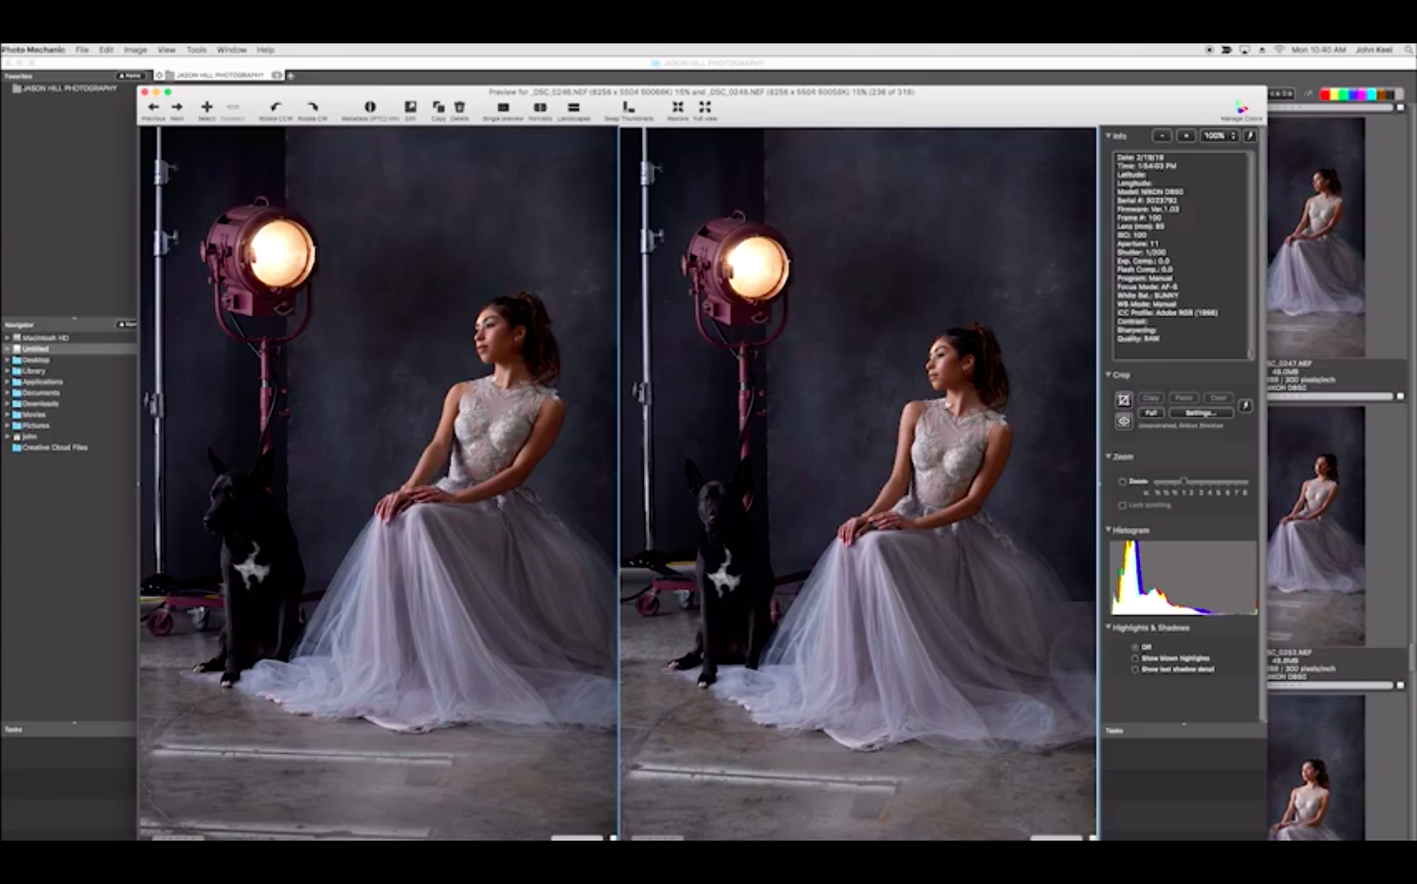
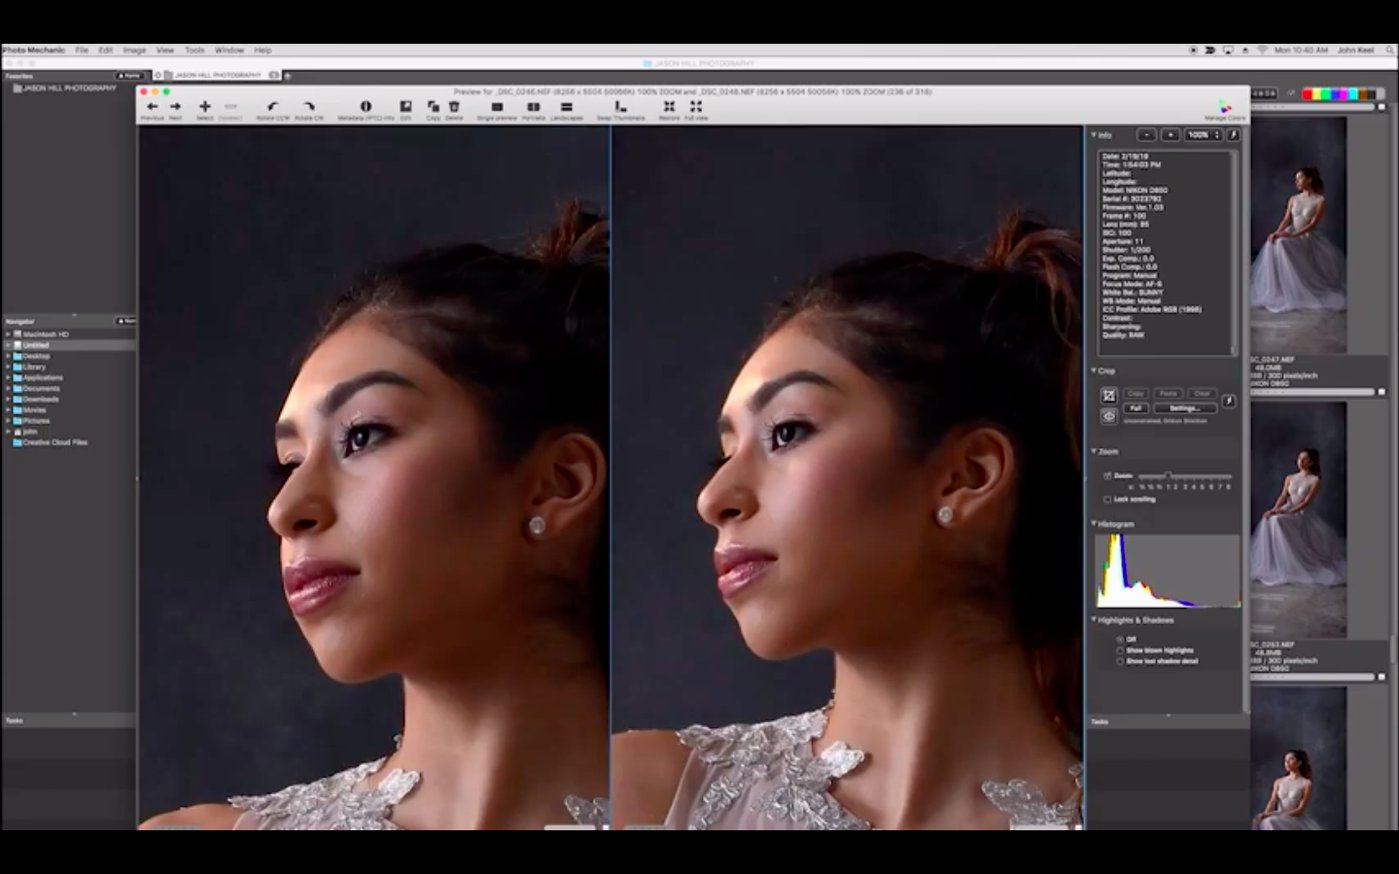
Now work through the contact sheet in full-screen mode. Mark the first-dance shots and the ceremony candids with a green colour class, and flag any misfires with a red class. Use the star ratings to separate the usable frames from the portfolio picks. When you find two similar frames of the cake-cutting, switch to side-by-side comparison to decide which has better expression.
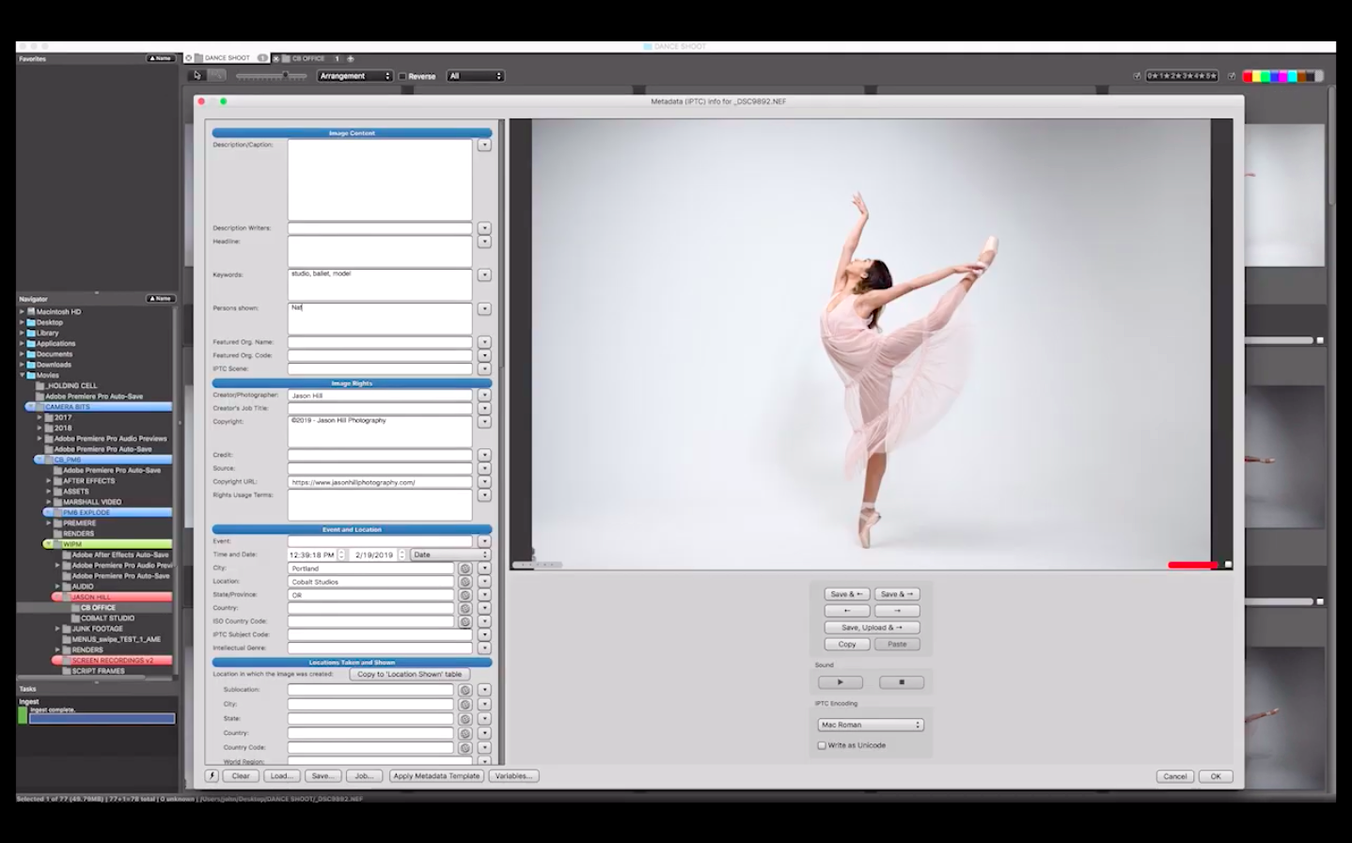
Once the selects are marked, filter the contact sheet to show only green-labelled images. Select all of them and open the IPTC Stationery Pad. Apply a template that fills the event name, the date, the photographer credit, and a generic keyword set — 'wedding, reception, couple, ceremony'. Then go through each green image individually, adding the specific names and a short caption in the Description field. The full-screen view lets you see the image large while you type.
Finally, export the captioned selects as web-optimised JPEGs into a folder named 'client-preview'. Burn the full raw set to a DVD as backup, then upload the JPEG folder to the client's FTP drop-box. The whole process — from card to upload — takes about thirty minutes for a typical wedding set.
Avoid retyping metadata by setting up an IPTC Stationery Pad
The most common error is not setting up an IPTC Stationery Pad before a shoot. Without a template, you end up typing the same event name and copyright line into every single photo, which defeats the purpose of batch metadata editing. Create the template during setup, not after the shoot.
Another mistake is relying on the file rename during ingest without testing the naming pattern first. A poorly chosen pattern — for example, one that includes a forward slash or a space — can break downstream workflows for lab printing or gallery software. Test the pattern on a small set before ingesting a full card.
Beginners also tend to colour-class every image instead of using the rating system alongside it. Colour classes are best for grouping by category or status — approved, rejected, pending edit — while star ratings handle the quality hierarchy. Using only one system leaves you without a way to separate 'good' from 'best' within the same category.
A third common slip is forgetting to sync metadata changes to the files before handing off the card. Photo Mechanic stores metadata edits in its cache by default; if you eject the card before writing those changes to the files, the captions and keywords are lost. Use the 'Save Photos' command or set the preference to write metadata immediately.
A sports editor's card-runner workflow under deadline
Jenna works the night shift at a regional newspaper's picture desk. During a Saturday football match, she receives a card runner every fifteen minutes with frames from the pitch. Her workflow in Photo Mechanic starts the moment the card hits the reader: she ingests with a pattern that includes the match date and the photographer's initials, then immediately applies a template with the team names, the league, and a generic 'action, football' keyword set.
She skims the contact sheet, colour-classing the goal shots and the red-card incident in yellow, and the crowd and bench shots in blue. For each yellow image, she types a one-line caption — 'Player A scores the opening goal, minute 23' — and uploads it to the FTP server for the layout team. The blue images go to the web team's FTP separately. Between card drops, she has time to check the newspaper's style guide for player name spellings and to verify the score in the captions.
For Jenna, the speed of the contact sheet render and the batch-apply features are what make the difference between hitting the deadline and not. She never opens an image in a pixel editor during the match — that would be someone else's job after the game.
Opens selected photos directly into Capture One or Photoshop
Photo Mechanic works well as a front-end to a pixel editor. After selecting and captioning images, you can open them in apps like Capture One or Adobe Photoshop directly from the contact sheet — the right-click menu sends the file to whichever editor you set as the external application. Once you finish editing and save, the changes appear in the contact sheet thumbnail automatically.
On the macOS side, the app respects the standard Services menu, so you can run Automator workflows on selected images. For example, an Automator service can rename files based on EXIF data and move them to a network folder, all triggered from within Photo Mechanic. The Finder integration is straightforward: the app writes XMP sidecar files for metadata, which Spotlight indexes, making your captions and keywords searchable from the Finder itself.
For users who need a DAM system alongside the browser, Photo Mechanic Plus is the logical companion — it adds a catalogue database for searching across multiple volumes without mounting each card. The standard version handles the per-card workflow, while the Plus version manages the archive side.
The built-in FTP upload uses the standard macOS networking stack, so it respects your system proxy settings and VPN connections. For photographers who work with a hot folder setup, the export-to-FTP function can be paired with a Hazel rule that watches the upload folder for new JPEGs and sends them to the desk automatically.
Before it goes on the Mac
- macOS 13 or later
- Apple Silicon
Questions from the room
Can I use Photo Mechanic on macOS 12 or earlier?
No. The current version requires macOS 13 or later.
Does Photo Mechanic work with video files?
The app is designed for still photos. It does not edit video but can browse and manage video files from some cameras alongside images.
Is there a trial version before I commit?
You can test the speed and workflow before buying.
Installing it on the Mac
- Mount the downloaded disk image.
- Drag the Photo Mechanic application to the Applications folder alias inside the disk image.
- Launch the app from the Applications folder once the copy finishes.
Notes from the control room
Sign in or open a catalogue account to leave a note.
No notes from the room yet. If you have used this build for a week, a short note helps the next person.