Home › Mac Apps › Color Finale

Updated
The catalogue note
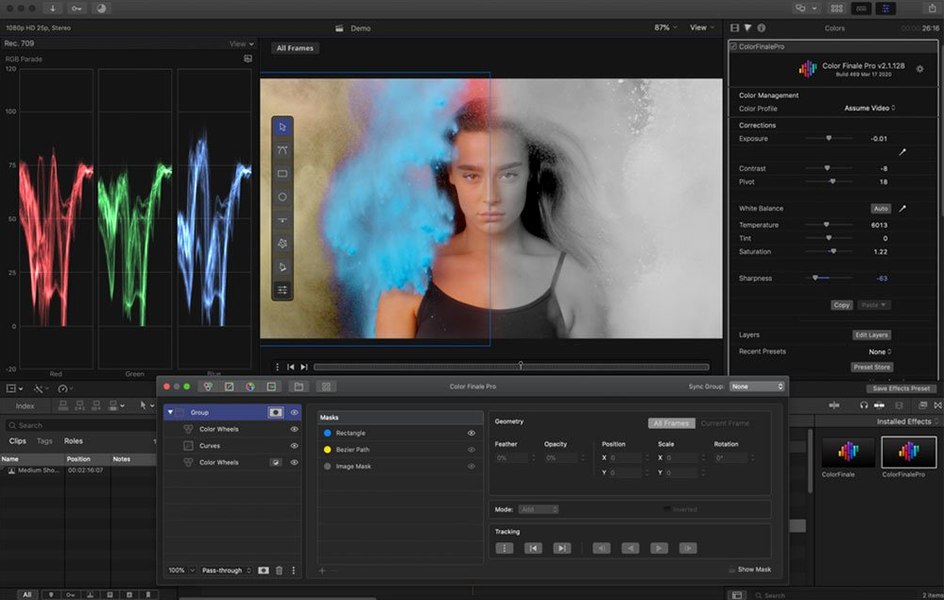
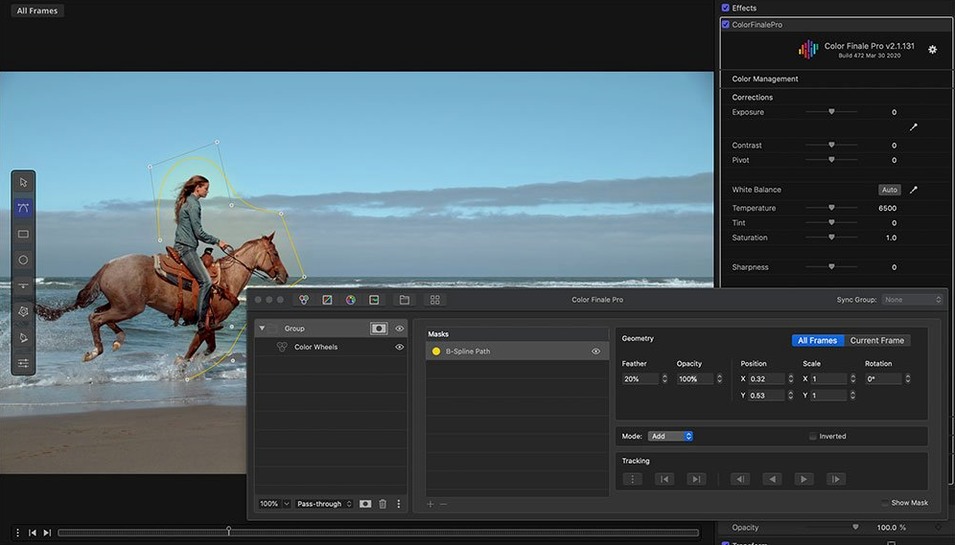
Color Finale 2 is a colour-correction plugin that lives inside Final Cut Pro, giving you a dedicated grading workspace without leaving the timeline.
Apply it on tracks and buses for full control
You apply Color Finale 2 as an effect on a clip, but it earns its keep when you think in terms of tracks and buses. On a single clip it handles primary corrections — exposure, contrast, colour temperature. On an adjustment layer above a sequence of shots, it acts as a scene-wide grade or a stylistic matte. For a whole programme, drop it on a connected clip on the top track to match or mood-shift everything beneath.
Typical workflow
- Select the clip or adjustment layer in the Final Cut Pro timeline.
- Apply Color Finale 2 from the effects browser.
- Start with the primary colour vectors and colour wheels to set overall balance.
- Use HSL Curves to target specific hues or luminance ranges.
- Call up LUT Utility to apply a look, then tweak opacity to blend it in.
- Save the result as a preset or share it via the Color Preset Store for reuse across projects.
The bonus look-recreation workflow helps you reverse-engineer a reference image, which is handy when a client points at something on their phone and says 'make it like that'. It is not a replacement for a full grading suite, but inside FCP it keeps the chain simple: source, effect, output.
Gatekeeper blocks the plugin after installation
The most frequent issue people hit after installing Color Finale 2 is Gatekeeper refusing to open the plugin. The installer includes a terminal command to bypass this, but if you skip that step the plugin simply won't appear in Final Cut Pro. Run the disk image again and follow the Gatekeeper-friendly prompt — it takes five seconds.
Another common snag: the plugin shows up in the effects browser but the interface is blank or shows only a grey box. This usually means the separate Color Finale application is not running. Color Finale 2 needs that background process to communicate with macOS. Check your Applications folder and launch it before opening Final Cut Pro. If you quit the helper app mid-session, the plugin stops responding until you restart both.
Users on newer macOS versions sometimes report that the plugin window is cut off or doesn't scale properly on Retina displays. This is a known limitation of the 2.2.8 build, which predates full Retina optimisation. Switching Final Cut Pro to a lower-resolution workspace mode can help, or you can use the plugin's own UI zoom setting — look for the resize handle in the bottom corner of the grading panel.
Best for Final Cut Pro editors grading short-form content
Editors who work primarily in Final Cut Pro and need a colour tool that stays inside the app will find Color Finale 2 most useful. It suits anyone who grades a lot of short-form content — social media clips, corporate videos, event highlights — where jumping into a separate grading application like DaVinci Resolve feels like overkill. The round-trip time for a single grade is near-instant because you never leave the timeline.
Colourists who work on longer projects, such as documentaries or branded content, also benefit when they need to apply a consistent look across many clips. The adjustment layer workflow and the Color Preset Store let you build a look once and apply it across an entire timeline with a few clicks. If you already own a set of LUTs, the LUT Utility makes importing and blending them straightforward.
Motion users get a bonus: Color Finale 2 installs as a video effect plugin for Motion too, so you can grade motion graphics and composite shots without exporting to Final Cut Pro first.
Don't apply it to every clip individually
The most common beginner mistake is applying Color Finale 2 directly to every clip individually. That works, but it creates a maintenance problem when you decide to change the overall look. Beginners forget to use adjustment layers or connected clips, which would let them adjust the grade for a whole scene from one place. Start with one adjustment layer above your sequence and apply the plugin there. Then tweak individual clips only for shot-specific corrections.
Another mistake: overusing the HSL Curves without first setting a proper primary grade. Beginners often jump straight into targeting a specific hue — trying to fix skin tones, for example — without balancing exposure and white balance first. The result looks unnatural because the curves are fighting a skewed baseline. Always do a primary pass with the colour wheels and vectors before touching HSL Curves.
Some beginners also ignore the LUT Utility's opacity slider. They apply a LUT at full strength, which often clips highlights or crushes shadows.
Study the 30 ASCEND presets on a vectorscope and waveform
- Spend an hour with the 30 ASCEND presets. Load each one onto a test clip and study what it does to the vectorscope and waveform. This teaches you how the colour wheels and curves translate into a specific look.
- Set up a simple project with five or six clips of different lighting conditions — daylight, tungsten, mixed indoor — and grade them using only the primary colour vectors. Resist the urge to open curves or LUTs until you can match the clips by eye with just the wheels.
- Save a neutral preset called 'reset' that zeros out all controls. When you get lost mid-grade, applying that preset brings you back to a clean slate without removing the plugin.
- Try the look-recreation workflow on a frame from a film or photograph. Import a reference image, load it as a still in Final Cut Pro, and use Color Finale 2's controls to match it. This is the fastest way to learn how each control affects the image.
- If you work with log footage, create a transform LUT using the LUT Utility and save it as a preset. Apply that preset to every log clip as a starting point, then grade from there. It saves repeating the same conversion steps on every shot.
Color Finale 2 is a tool that rewards a methodical approach. The first few sessions will feel slower than grading by eye, but after a week the workflow becomes second nature. Keep the Color Preset Store open for reference — other editors' presets can show you combinations of wheels and curves you would not have tried on your own.
Before it goes on the Mac
- macOS 10.12 or later
- Intel-based Mac
- Final Cut Pro 10.7 or newer
Questions from the room
Which versions of Final Cut Pro does Color Finale 2 support?
Color Finale 2 works with Final Cut Pro 10.7 or newer, and it requires a separate Color Finale application to operate within the macOS framework.
Is Color Finale 2 available in languages other than English?
Yes, the interface is localised in English and Simplified Chinese.
Installing it on the Mac
- Mount the disk image and run Open Gatekeeper friendly.
- Press Enter in the Terminal window to bypass Gatekeeper.
- Drag the application to the Applications folder.
- The application is ready to use.
Notes from the control room
Sign in or open a catalogue account to leave a note.
No notes from the room yet. If you have used this build for a week, a short note helps the next person.