
Home › VST Plugins › ShaperBox
ShaperBox 3.6.1 (Mac)
Updated
The catalogue note
When a track needs to move in time with the beat, static effects fall short. ShaperBox 3 from CableGuys answers with a modular suite of rhythmic shapers — each one an LFO-driven effect that ducks, filters, widens, or distorts in sync with your tempo. It turns a plain chord stab into a pulsing groove, or a held pad into a rhythmic texture, all from one window.
Draw gain curves for pumping or gated effects
- VolumeShaper – draws gain curves for sidechain-style pumping or choppy gates.
- FilterShaper – sweeps the cutoff in patterns, adding movement without touching the arrangement.
- PitchShaper – bends pitch and formants; the 3.6.1 update adds automation for Formant Link, Density, and Grain Size.
- TimeShaper – stretches or reverses audio for glitch effects.
- DriveShaper – modulates distortion amount for rhythmic grit.
- WidthShaper – pans or widens the stereo field in sync.
How it feels in a mix
Each module loads as a separate effect, so you can stack them in any order. The LFO shapes are drawn directly on a grid, and the sync options cover bars, beats, and triplets. It runs on Apple Silicon and Intel Macs, and version 3.6.1 fixes a Logic Pro issue where the cursor vanished after dragging a control — a small but welcome repair for anyone who spends hours tweaking curves.
Switch from Straight to Dotted or Triplet timing first
ShaperBox 3 ships with default curves that are safe but bland. Before you load a preset, open the VolumeShaper and switch the timing mode from Straight to Dotted or Triplet — the difference is immediate. Straight divisions lock to the grid, but dotted eighths give a swung, lopsided feel that sits better in hip-hop and house grooves. Triplets break the grid entirely, useful for fills or build-ups.
Next, enable Multiband on the module you intend to use most. By default each shaper affects the full frequency range. Splitting into low, mid and high bands lets you, for example, duck only the low end with VolumeShaper while the mid and high remain untouched — a cleaner sidechain than a global gain cut. The split points are adjustable, so set them where your kick and snare live.
Turn on Audio Trigger even if you are not using an external sidechain signal. In its default state the trigger listens to the input track itself; this makes the LFO reset on every transient, keeping the shaping locked to the performer’s timing rather than a rigid grid. It works especially well on vocal chops or live instrument loops where swing varies.
Finally, disable Anti-Click Trigger Smoothing if you hear a faint fade-in at the start of each shape cycle. The smoothing prevents clicks on sharp edges but can soften attacks. For aggressive gating or stutter effects, turn it off and adjust the curve’s attack slope manually instead.
A workflow for rhythmic sidechain without a compressor
This task assumes you have a pad or synth held note that needs to pump behind a kick drum, without inserting a compressor on the bus.
- Insert ShaperBox 3 on the pad track. Open the VolumeShaper module.
- Draw a curve that drops to silence on beat 1, rises sharply on beat 2, holds near full volume on beats 3 and 4, then drops again. The shape should mimic a compressor’s release curve but faster.
- Set the timing mode to Straight and the rate to 1/4 (quarter notes). This matches a standard kick pattern.
- Enable Multiband and set the low band split at 120 Hz. Draw a separate curve for the low band — deeper ducking (down to -24 dB) — while the mid and high bands duck only to -6 dB. The pad’s body stays present while the low end clears out for the kick.
- Open WidthShaper after VolumeShaper in the chain. Draw a curve that narrows the stereo field on the kick hit and widens it during the sustain. This adds motion without extra tracks.
- Play the loop. If the pump feels too late or early, nudge the LFO phase offset by a few degrees. The sidechain visual display shows exactly where the ducking starts relative to the audio waveform.
The result is a sidechain effect that responds only to the grid, not to a compressor’s threshold or ratio. It stays consistent even if the kick changes velocity.
Audition presets with the browser closed
- Audition presets with the browser closed. The preset browser lists over 600 entries. Instead of clicking through them one by one, load the category that matches your task (Pump, Gate, Filter, Glitch) and cycle with the arrow keys. Listen for three bars before deciding — some shapes reveal their character only after a full loop.
- Copy the LFO curve from one module to another. If you spend time drawing a curve in VolumeShaper, you can apply the same shape to FilterShaper or WidthShaper without redrawing. Right-click the curve display and copy; paste into the target module. The timing and rate carry over too.
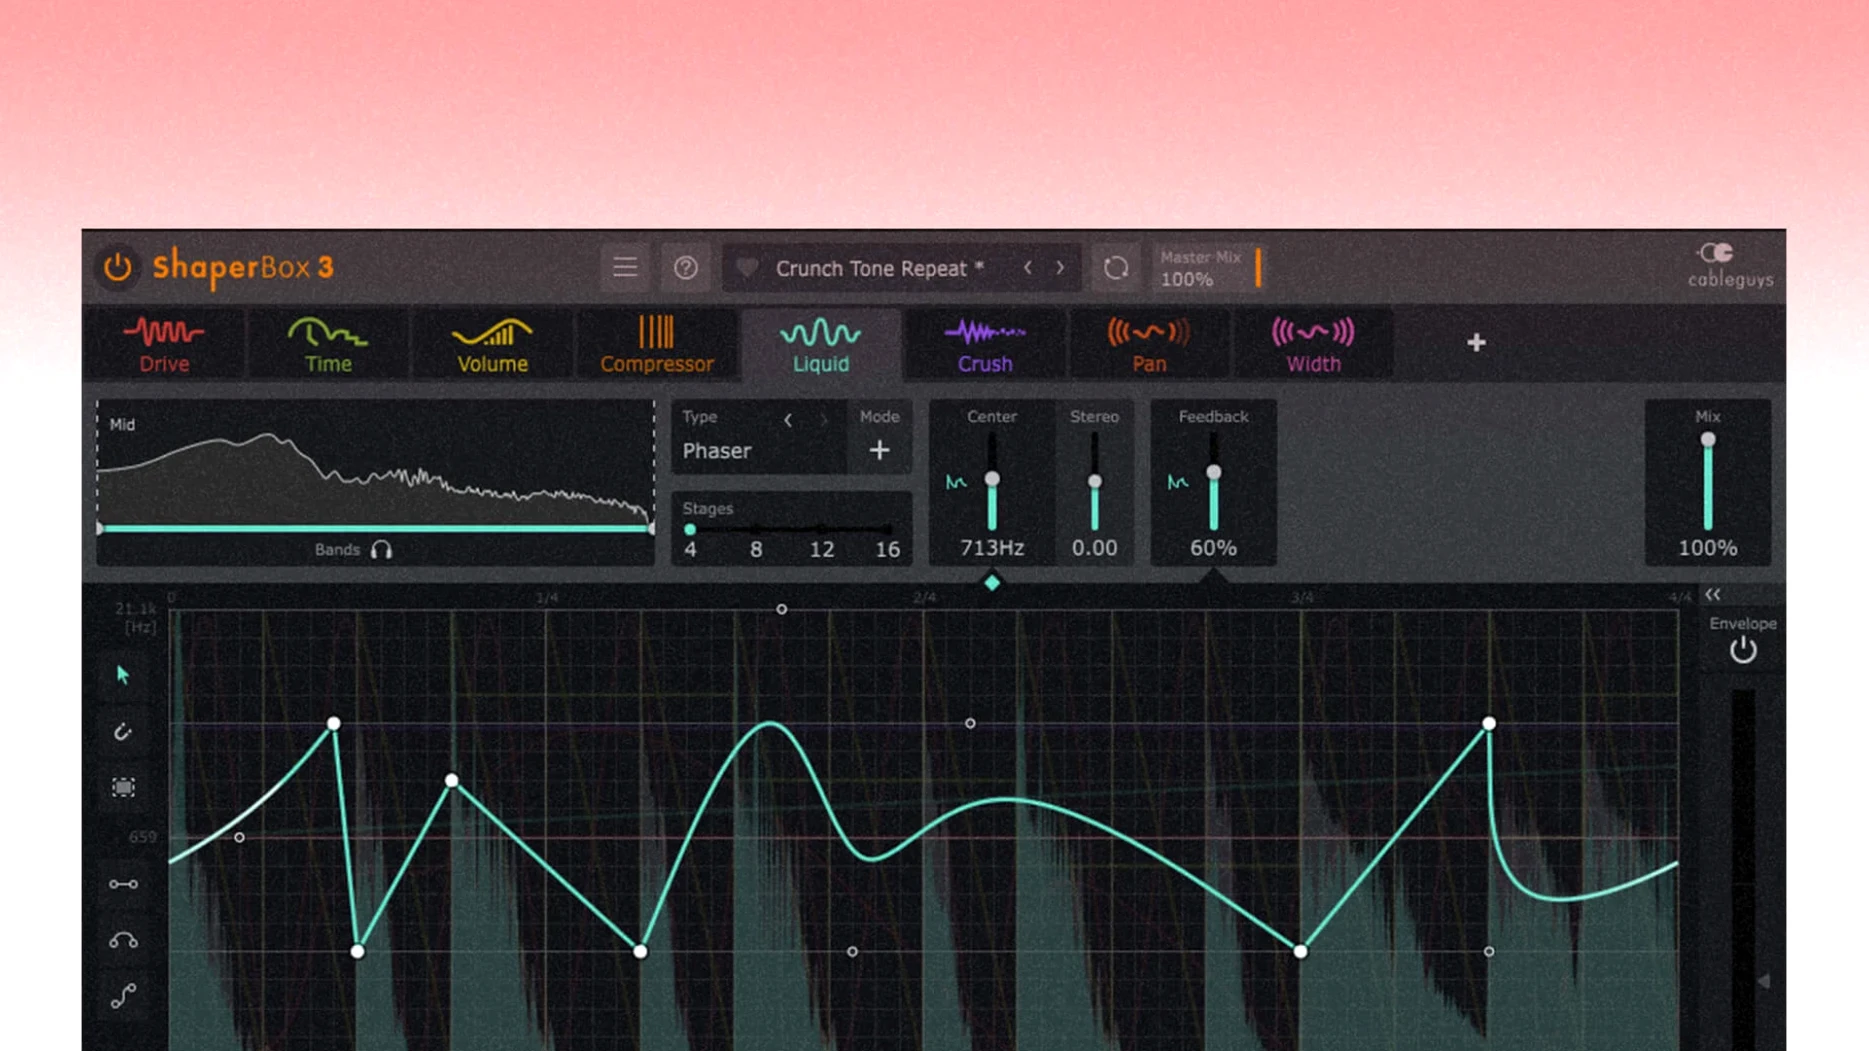
- Use the LiquidShaper on hi-hats. The flanger and phaser modes in LiquidShaper sound thin on full-range sources but add a metallic swirl to closed hi-hats or shakers.
- Check the Audio Trigger display when adding a new source. If you route a sidechain signal from another track, the sidechain visual display shows the waveform. Adjust the trigger threshold so that only the kick or snare fires the reset, not the hi-hats. A threshold set too low causes random resets and a choppy feel.
- Save your own curve as a user preset. After tuning a shape for a specific kick or snare, save it. Next session you can load it and adjust only the rate or depth without rebuilding the curve.
Best for electronic producers and sound designers building textures
Electronic music producers working in Ableton Live, Logic Pro or FL Studio are the obvious audience — the beat-synced LFOs replace several tracks of automation or sidechain compression. But the plugin also suits sound designers who build textures for video or games. The PitchShaper with its updated Formant Link and Grain Size automation lets you morph a single vocal sample into a pitched, granular layer that follows a MIDI pattern.
Mix engineers who handle pop or dance genres will find the multiband VolumeShaper useful for cleaning up low-end clashes without inserting a dynamic EQ. Instead of sidechaining the entire mix bus, you can duck only the low band of a bass synth against the kick, leaving the upper harmonics untouched. The same approach works on stereo width — narrowing the low frequencies during a kick hit keeps the mono compatibility intact.
That decision is yours. What matters for the workflow is that the plugin runs natively on both Intel and Apple Silicon Macs, so it behaves identically on older Mac Pros and the latest MacBook Pro models. The 3.6.1 fixes for Logic Pro’s cursor disappearance and the silent-input audio artifact are minor but show that CableGuys maintains the software for daily studio use, not just for show.
For anyone who shapes audio by hand — drawing curves, setting split points, triggering from transients — ShaperBox 3 replaces a rack of utility plugins with one modular tool. It does not replace a compressor, but it does what a compressor cannot: rhythmic, sample-accurate shaping that follows the arrangement rather than the envelope.
Changes in this build
- PitchShaper’s Formant Link, Density, and Grain Size are now automation parameters.
- Fixed an audio artifact that could occur when a MIDI note or Audio Trigger was received while the input was silent.
- Fixed a Logic Pro issue where the mouse cursor disappeared after dragging a control.
Before it goes on the Mac
- macOS 10.15 or later
- Apple Silicon or Intel 64-bit
Questions from the room
Does ShaperBox 3 work on Apple Silicon Macs?
Yes, ShaperBox 3 supports both Apple Silicon and Intel 64-bit systems.
Installing it on the Mac
- Open the downloaded disk image.
- Run the standard installation procedure.
- Open the included VR.nfo instruction file.
Notes from the control room
Sign in or open a catalogue account to leave a note.
No notes from the room yet. If you have used this build for a week, a short note helps the next person.
Also filed under VST Plugins
The whole VST Plugins rack Serum2.1.5 VST Plugins 1.2 GB
 Sonible smart:EQ 41.1.0 VST Plugins 432 MB
 Sonic Academy KICK1.1.8 VST Plugins 358 MB
 RipX DAW Pro8.0.3 VST Plugins 1.6 GB
 reFX Nexus5.5.21 VST Plugins 72 MB
 Steinberg SpectraLayers Pro13.0.40 VST Plugins 3.8 GB Updated
 T-RackS6.3.2 VST Plugins 2.3 GB
 Plugin Alliance Brainworx Bundle2025.06.16 VST Plugins 2.1 GB