
Home › VST Plugins › Melodyne
Melodyne 5.4.2 (Mac)
Updated
The catalogue note
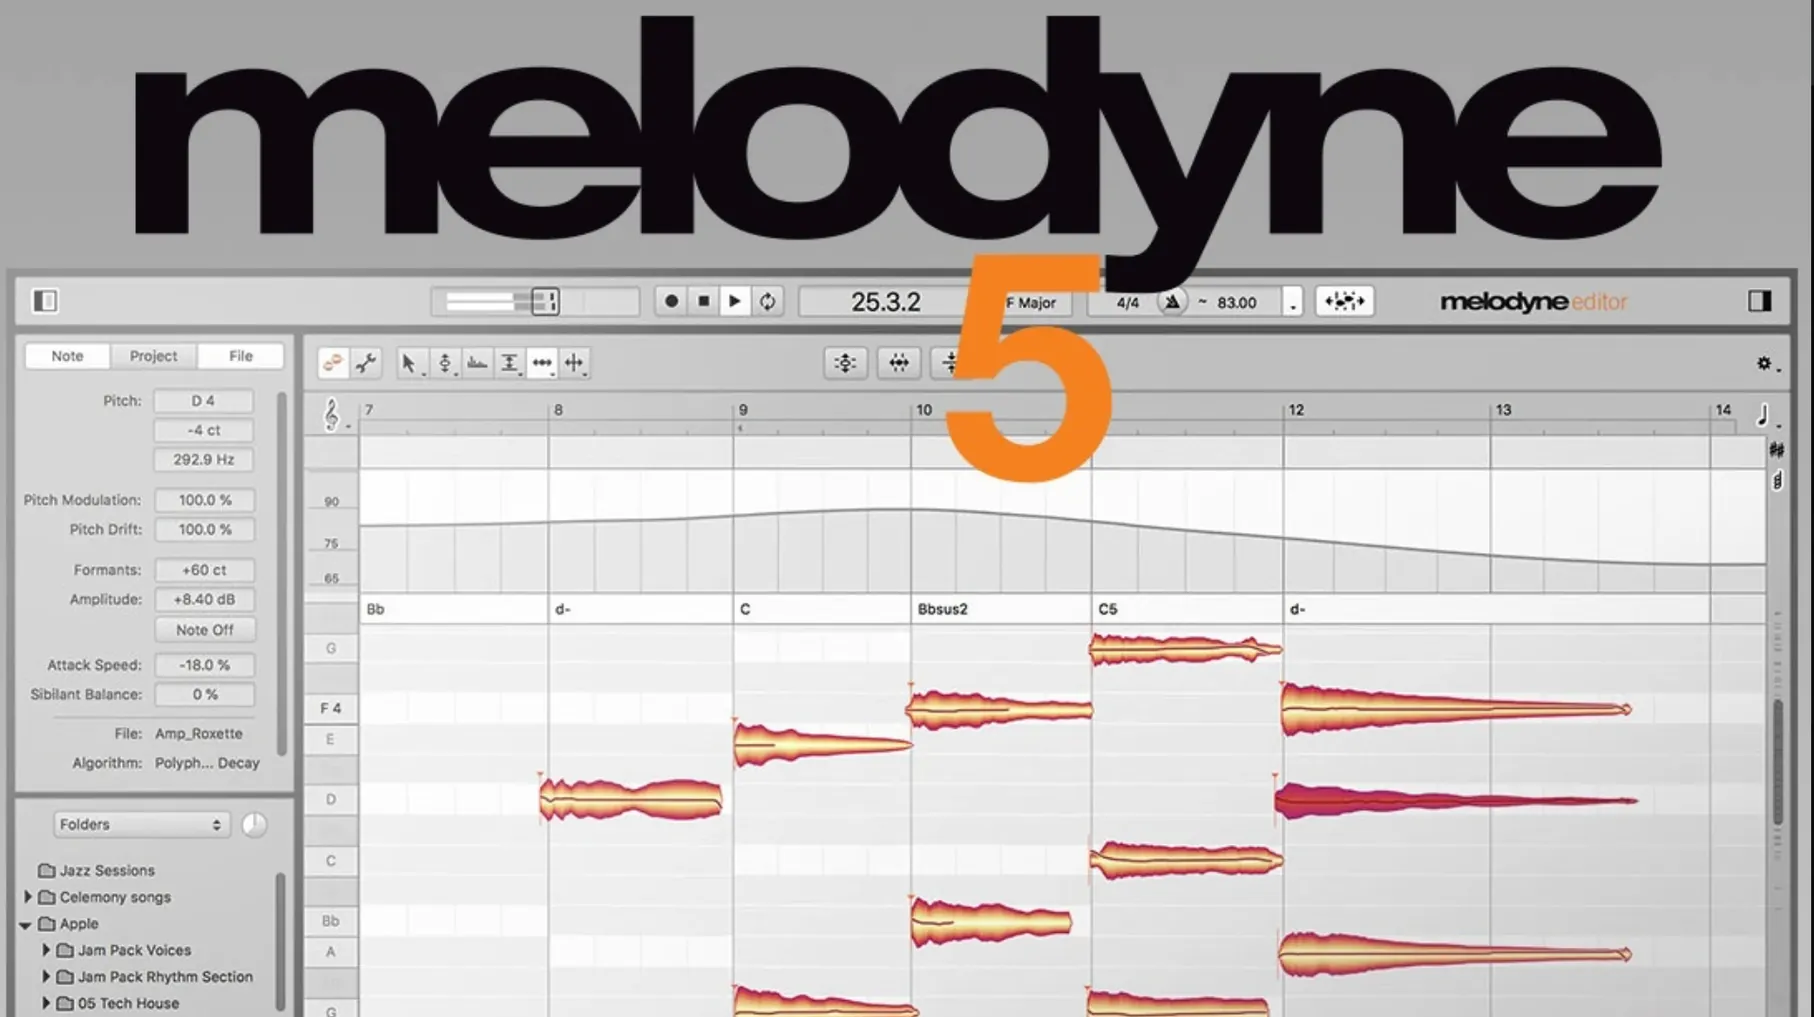
When a vocal take drifts sharp or a drum hit lands late, fixing it note by note without destroying the feel is the real problem. Melodyne 5.4.2 Studio for Mac solves that by analysing audio into individual notes — pitch, timing, vibrato, formants, volume, even sibilants — and letting you edit each one directly. It runs natively on Apple Silicon and supports ARA mode for deep DAW integration.
- Will it work with my DAW? Yes, if your DAW supports ARA (e.g. Logic Pro, Cubase, Studio One) or standard plug-in hosting. The 5.4.2 update fixed a crash that could occur when opening Melodyne in ARA and plug-in use cases.
- Does it run on Apple Silicon? Yes, version 5.4.2 runs natively on Macs with Apple Silicon processors. It also works on Intel Macs running macOS 10.12 or later.
- Can I edit more than vocals? Yes. Melodyne works on vocal recordings, samples, and other monophonic or polyphonic material. It includes a Percussive Pitched algorithm for drums and percussive sounds.
- What can I actually change note by note? Pitch, timing, vibrato, volume, length, formants, and sibilants. You can also adjust the volume of individual syllables manually and analyse chords, keys, tunings, and tempos.
- Which edition is this? This is the Studio edition — the full version with all algorithms and features. Other editions (Essential, Assistant, Editor) have reduced functionality.
Those are the questions that usually come up before installing. If your DAW is recent and you need granular control over pitch and timing without aliasing artefacts, Melodyne 5.4.2 Studio is the tool.
Open preferences before loading audio for faster daily work
After installing Melodyne 5.4.2 Studio, open the preferences before you load any audio. The defaults are sensible for general use, but a few changes make daily work faster.
Audio device and buffer
If you run Melodyne standalone rather than as a plug-in, set the audio device to your interface and adjust the buffer size to match your usual DAW setting. A buffer of 256 samples is a safe starting point for editing — low enough for responsive playback, high enough to avoid dropouts on complex polyphonic material.
ARA mode behaviour
For DAWs that support ARA, Melodyne can transfer audio data directly without rendering or bouncing. Check that ARA is enabled in the plug-in settings. If you work with Logic Pro or Studio One, ARA saves the step of transferring audio manually after each edit.
Default algorithm
Melodyne Studio offers several algorithms: Melodic, Percussive, Polyphonic, and Percussive Pitched. If you mostly edit vocals, set the default to Melodic. For drums and percussion, switch to Percussive Pitched — it handles transient-rich material better than the generic Percussive option.
Display and editing preferences
Enable note separation lines and pitch grid if they are off by default. These visual guides help you spot stray notes quickly. Turn off automatic scrolling if you prefer to control the view manually during fine edits.
Trackpad scrolling revised for more precise note editing on MacBooks
Version 5.4.2 brought three changes that affect how you work day to day.
- Trackpad scrolling revised. Scrolling through long takes in the Note Editor now feels more precise. The previous version could feel laggy or jumpy on MacBooks; 5.4.2 smooths that out without changing the gesture behaviour you are used to.
- Crash fix for ARA and plug-in use. A specific case where opening Melodyne could crash the host DAW under certain circumstances is now resolved. This mainly affected users who loaded Melodyne on tracks with heavy processing chains or unusual sample rates.
- macOS Sequoia adaptations. If you have upgraded to macOS 15, Melodyne 5.4.2 runs without the compatibility warnings or graphic glitches that earlier builds showed on that system.
None of these are headline features — they are the kind of polish that makes the difference between a tool you trust and one you second-guess.
Start with a clean vocal take to learn Melodyne's workflow quickly
Getting comfortable with Melodyne takes a few sessions. These tips save time while you learn the workflow.
- Start with a simple vocal take. Pick a single, clean vocal line with no background noise or heavy reverb. Analyse it, then move a few notes to correct pitch drift. This builds muscle memory for the Blending Tool and Note Assignment tool without the complexity of polyphonic material.
- Use the Leveling Macro before manual volume edits. The Leveling Macro evens out note-to-note volume differences in one pass. After that, you only need to touch the loudest or quietest notes by hand — the macro does the rest.
- Learn the Fade Tool early. Note-based fades let you soften the attack or release of individual notes without affecting adjacent ones. This is useful for breathy vocal entrances or percussive hits that need a gentler start.
- Keep the original file backed up. Melodyne edits are non-destructive within the session, but it is easy to overwrite a take if you export or bounce without checking. Keep the original audio file separate.
- Check the algorithm selection after analysis. If a drum loop sounds odd after analysis, switch to Percussive Pitched. If a vocal sounds robotic, switch to Melodic. The default algorithm is not always the best match for the material.
A workflow for tuning a vocal to a specific key
Here is a complete workflow for taking a vocal track that is slightly out of key and correcting it without losing the natural performance. This assumes you are working inside a DAW with ARA enabled.
Step 1: Analyse
Insert Melodyne on the vocal track. In ARA mode, the audio appears automatically in the Note Editor. If your DAW does not support ARA, transfer the audio using the Transfer tool or render the clip first. Click the Analyse button and wait for Melodyne to detect notes, pitch drift, and noise.
Step 2: Detect key and tuning
Open the Scale Detector. Melodyne analyses the vocal and suggests a key and scale. If the vocal is meant to follow a specific key in your composition, set that key manually in the Scale Ruler. Notes outside the scale will be highlighted — these are the ones you need to correct.
Step 3: Correct pitch globally
Select all notes in the track. Use the Pitch Correction tool to pull them towards the nearest scale tone. Listen back. If the vocal sounds too corrected, reduce the amount.
Step 4: Fix individual notes
Zoom into sections where the pitch correction did not work well — typically at phrase starts or ends where the singer slid into the note. Use the Note Assignment tool to check if Melodyne misidentified a note. Then use the Pitch Modulation tool to adjust the shape of the pitch curve without changing the note’s overall pitch.
Step 5: Adjust timing
If the vocal rushes or drags against the beat, use the Timing tool to nudge individual notes forward or backward. Melodyne shows the grid based on the tempo it detected. Drag notes to align with the grid lines. For a natural feel, leave slight variations — perfect timing often sounds stiff.
Step 6: Volume and fades
Use the Leveling Macro to even out loud and soft notes. Then apply the Fade Tool to soften the attack of any plosive or hard consonant sounds. If a syllable is too breathy, reduce the noise component using the Note-based Volume tool.
Step 7: Export or commit
When you are satisfied, either render the track in your DAW or leave Melodyne active for further tweaks later. In ARA mode, the edits stay live until you commit them.
Vocal editors and recording engineers benefit most from Melodyne Studio
Melodyne Studio is not a tool every Mac user needs, but for specific workflows it is essential.
Vocal editors and recording engineers benefit most. If you spend hours tuning vocal takes, correcting pitch drift, or matching a singer’s performance to a fixed key, the note-by-note control and ARA integration save enormous time compared to manual pitch shifting or retakes.
Music producers working with samples find the Percussive Pitched algorithm useful. A drum loop recorded slightly off tempo can be adjusted without altering its character. A sample that clashes harmonically with the track can be tuned to the correct key.
Composers and arrangers use Melodyne to restructure audio — moving a melody up or down an octave, changing chord voicings in a polyphonic recording, or extracting a single note from a chord. The Polyphonic algorithm makes this possible on material that would be uneditable with standard pitch tools.
Post-production audio engineers working on dialogue or ADR can correct pitch and timing in voice recordings without introducing artefacts. The Fade Tool and Leveling Macro help clean up inconsistent levels across a take.
For casual users who only need basic pitch correction on an occasional vocal track, the Essential or Assistant edition would be enough. The Studio edition’s extra algorithms and note-based editing depth only matter if you push against the limits of what simpler tools can do.
Changes in this build
- Optimisations and bug fixes for macOS Sequoia
- Improved trackpad scrolling
- Fixed a crash that could occur when opening Melodyne in ARA and plug-in use cases
Before it goes on the Mac
- macOS 10.12 or later
- Intel or Apple Silicon processor
- Interface language: English
Installing it on the Mac
- Mount the downloaded disk image.
- Run the standard installation procedure.
Notes from the control room
Sign in or open a catalogue account to leave a note.
No notes from the room yet. If you have used this build for a week, a short note helps the next person.
Also filed under VST Plugins
The whole VST Plugins rack LFOTool1.768 VST Plugins 7 MB
 Komplete Kontrol3.5.4 VST Plugins 785 MB
 iZotope Insight2.4.0 VST Plugins
 Plugin Alliance Brainworx Bundle2025.06.16 VST Plugins 2.1 GB
 reFX Nexus5.5.21 VST Plugins 72 MB
 RipX DAW Pro8.0.3 VST Plugins 1.6 GB
 EZdrummer3.1.2 VST Plugins 786 MB
 Serum2.1.5 VST Plugins 1.2 GB